A guide to the best motorcycle levers tested by MCN and how to replace them
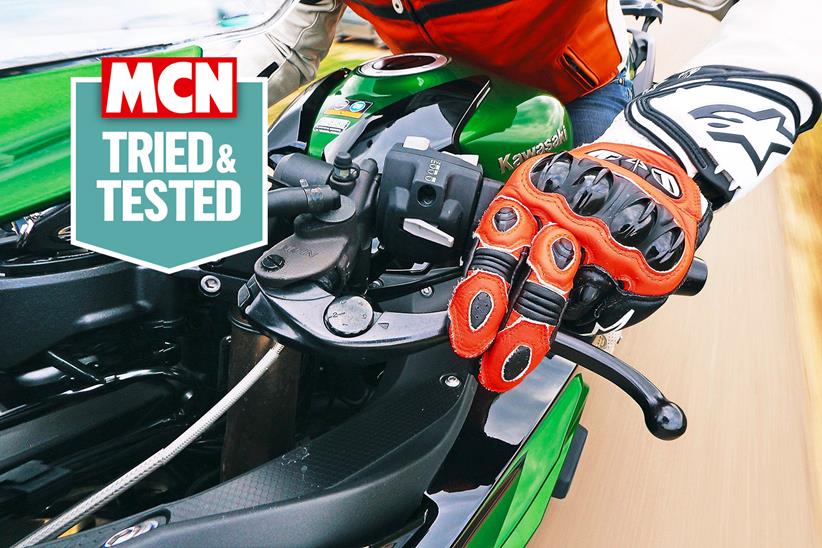
One of the most tactile parts of your bike are its control levers, for the front brake and clutch. But it’s also true that they’re one of the most vulnerable motorcycle accessories; even in a low-speed crash or stationary drop they can end up being damaged or snapped, leaving you needing to find replacements.
They are a relatively easy modification to make using a a basic motorcycle tool kit so there’s no need to worry too much about paying a garage labour. See a full walkthrough at the bottom of this article.
Jump to:
- What to consider when buying motorcycle levers
- The best tried and tested levers
- How to replace you levers
- Frequently asked questions
- How we test kit
At the same time, it’s also true that standard levers can be fairly plain and they often come without span adjusters, preventing you from achieving the perfect set up to be comfortable when riding.
You can get bright anodised coloured ones so that you can match the levers to any designs on your bike, there’s ‘shorty’ style levers designed to be used with just with your first two – index and fore – fingers. Some will fold meaning that if you end up laying your bike down unexpectedly, they will fold and are far less likely to break, meaning you don’t need to spend more money to replace them again.
What to consider when buying replacement levers
So which should you go for? Consider whether you prefer full-length long levers or ‘shorty’ levers and how comfortably you can reach the levers, I find that I require adjustment to allow the levers to be closer to the grips for my small fingers, so you might want to go for an option with adjusters. Better quality levers should have adjusters that are easy to operate while wearing motorbike gloves so that you can make changes to the reach while riding.
It’s also really important to look for good quality levers, ideally that have been specifically designed for your particular motorcycle model. If you try to save money and buy a poor quality universal pair, you may find that they interfere with the proper function of your bike with potential dead zones in braking or even improper brake light operation.
The best motorcycle levers that we have tested
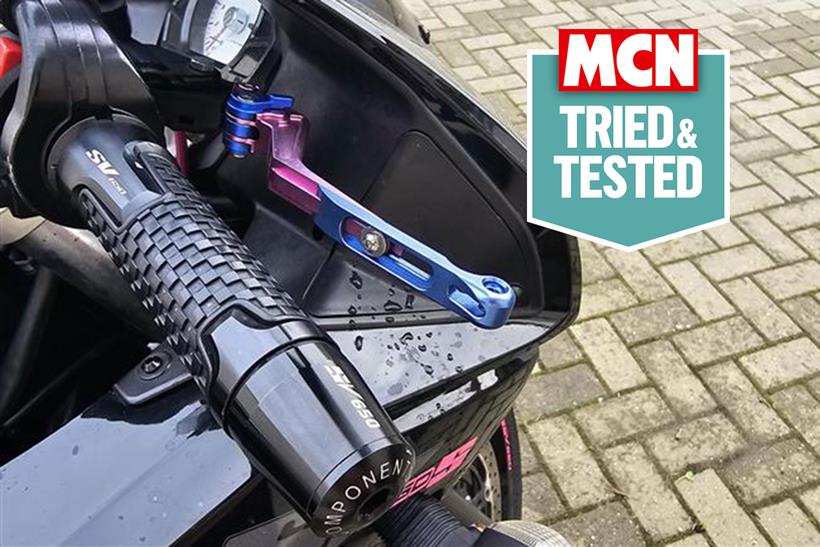

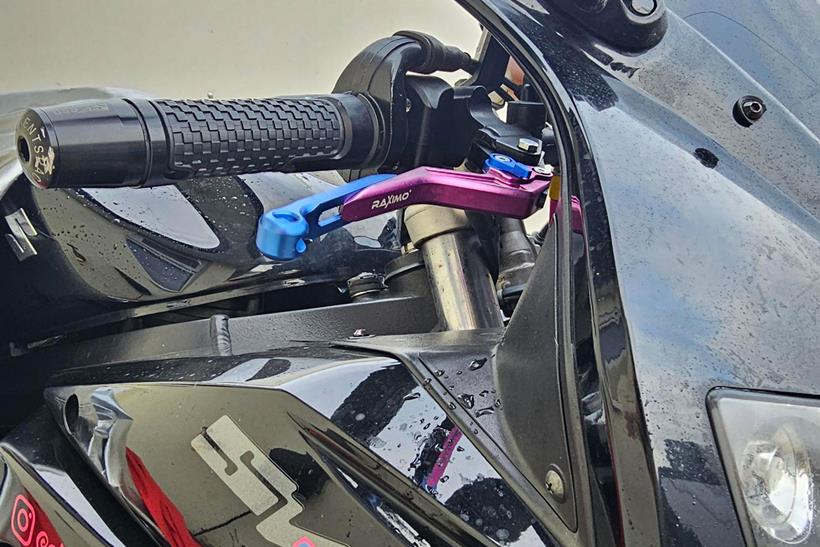
"I wanted to replace the stock levers on my Suzuki SV650S as I was not a fan of the big silver ones on my almost all black bike. I struggled a little with the reach for my little hands, so I looked into buying some adjustable ones. I wanted a pair that would match the colours I had added to the bike, pink and blue, which I found tricky until I came across the Raximo BCE levers. With these levers you can choose the colour you want for each part of the lever, so I was able to pick out pink for the main lever and blue for the end pieces and adjusters."
"They are adjustable both for reach as well as the length, anywhere from short to long levers so that you can get them just right for you. The only issue that I have had with these levers is that the end piece for the clutch lever fell off while riding recently after the screw that holds the two pieces together rattled itself loose, but a little bit of threadlocker when fitting would have fixed this. You are also able to order just replacement end pieces from Raximo, which I have done to make my clutch lever whole again."
"The quality feels nice and they were easy to fit with no issues. They have faded slightly in the sun over the last two years or so but much less than other cheaper levers I have used in the past."
Pros
- Customisable with various colour choices
- Feel good quality
- Adjustable in both length and reach
Cons
- End piece fell off so use a thread locker when fitting
| Construction | High strength aluminium |
| Type | 2 way adjustable CNC levers |
| Length | Short or long |
- Milled from the solid
- All screw connections comply with DIN standards
- The anodisation of the RAXIMO levers complies with the highest quality standards
- The length of the lever can be adjusted by 35 mm by means of a special connection
- Ergonomically adjustable to the length of the finger or hand
- High-strength aluminium as used in aircraft construction


"There’s a lot to like about the Interceptor 650, but one of its few niggles is the lack of ergonomic adjustability of the bar levers. Both brake and clutch items are fixed, and furthermore feel light and dare I say it, accepting the price of the bike, cheap."
"It was Tec Bike Parts to the rescue with their CNC alloy set of levers, which are designed to fit the unique setup found on the Interceptor and Continental GT 650 twins."
"On first inspection they’re beautifully engineered with six reach positions available via a thumb toggle for easy adjustment while riding, even with gloves on. Installation was a breeze too, thanks in part to Tec’s exceptional instructions, both in the box and online. It’s something this company does very well indeed. You can pick silver or black, and I’d decided since the K-Tech rear shocks were the latter, I’d chose that for the levers too."
Pros
- Easy to fit and install
- Beautiful engineering and quality
- Great instructions in the box
Cons
- None I can think of
| Construction | CNC machined from billet alloy |
| Type | Adjustable levers |
| Length | Long levers |
- Anodised for durability in Black or Silver to match your bike.
- 6 position reach adjustment with click indent.
- Can easily be adjusted even with gloves on.
"In 2019 I had a ride-ending crash which bent my 2014 Honda CRF250L’s rear brake lever in half. I lost the front on the loose and dusty surface, but the lever dug in far enough to catch the hard pack. I was able to limp home, and replacement OE levers are cheap. But fearing the same thing could happen again – or worse – I decided to upgrade to some tougher, folding levers.
"Made from CNC machined aerospace grade aluminium, the RFX Pro FT levers have cold-forged arm, heat treated to increase strength and with a smooth finish to prevent snagging on obstacles and ruts encountered with off-road riding. The spring-loaded, rotatable tips are CNC machined from aluminium with a knurled tip on the gear lever and teeth on the rear brake lever tips for increased grip in slippery conditions.
"The significantly more expensive and complex design of the rear brake lever also features a cable snake bolts to an existing lug on the bike’s frame, preventing it from being bent backwards in a crash – exactly as my OE lever did.
"If you’ve never done the job before, removing the OE levers and fitting the new ones is a bit fiddly, but uses the same fixtures and fittings as the originals. A split pin on the back of the brake lever was the trickiest part, needing me to get under the bike to see what I was doing. YouTube videos were helpful, but I’m no mechanic and managed the job without calling for help.
"They won’t make you a better rider, and generally speaking you don’t notice any operational difference between the RFX levers and OE – other than the grip from the tips when its muddy and slippery. But having seen how easily the OE lever was damaged, there’s been no sign of any such failure from the incredibly strong RFX units. As a hobby-level greenlaner, I’ve had my fair share of offs but an enthusiastic approach to riding off road means the levers have clouted plenty of rocks and roots. They’ve survived a near-head on collision with a tree, and even a high-side off a grass bank where the bike rolled and landed upside-down.
"They’re possibly overkill on a 250L - which isn’t exactly a pukka dirt bike - but after almost three years and three thousand miles of use – the majority of which is on trails around Thetford Forest and the Peak District, they bear only a few scratches to the spring-loaded tips and they still work perfectly.
"With their slick, black arms and anodised tips (available in a variety of colours), the RFX levers look every-bit like pro equipment. They add a touch of class to my budget commuter-turned reliable mud-plugger.
"Flawless performance from these high-quality replacement levers, with few signs of wear from plenty of use. They’ve survived the sort of incidents that destroyed the OE brake lever, shrugging off crashes with ease and they look great too. If they seem expensive, consider how much hiring a van to get you home from the trails would be if you couldn’t ride due to a broken lever…"
Pros
- Light weight and strong compared to stock
- Faff-free fitting
- Look very cool
Cons
- There really aren't any
- 7075 aerospace aluminium with spring-loaded anodised tips
- Forged shaft for increased core strength.
- Smooth shaft design to reduce surface wear.
- CNC machined billet flexible tip.
- Rotating action reduces impact damage.
- Mechanical stop on the tip.
- Incorporated brake snake.
- Colour anodised to prevent corrosion.
- Laser etched logo.
Other levers to consider


This one’s a clutch lever for the Suzuki V-Strom. If you want a matching brake lever that’s extra. And, as before, it’s vital that you get the correct levers for your bike.
Pros
- Like-for-like replacement
- Great value
- Decent ratings
Cons
- Not really an upgrade
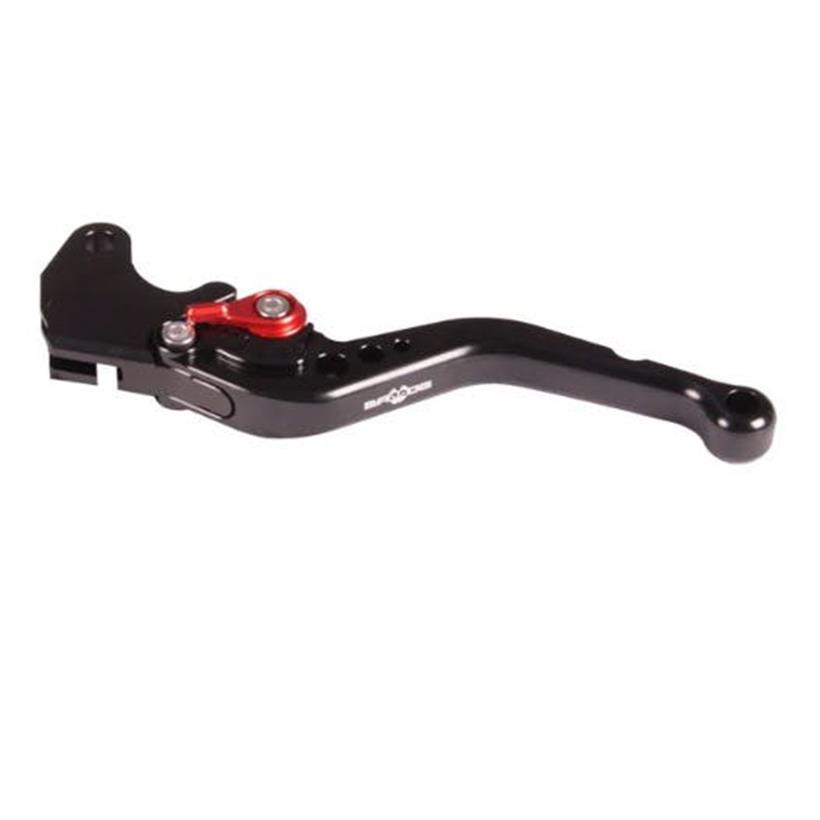

This one is specific to a variety of Suzuki models so check you’re getting the right ones plus the price is just for one lever, not a set.
Pros
- Quality finish
- Adjustability
- Variety of styles and fitments
Cons
- Not the cheapest
How to change your levers
This how to guide by Bruce Dunn is a helpful explainer on how to remove and replace your clutch and brake levers.
Step 1: remove the old lever
Wind in the cable adjuster and line up the gap to allow the cable to have enough slack to let the nipple be eased out of the lever. Next, undo the pivot bolt and nut – you’ll most likely need a 10mm spanner – free the lever and discard. Some older bikes may be fitted with non-standard bolts, as is the case here. These should be replaced with new originals.
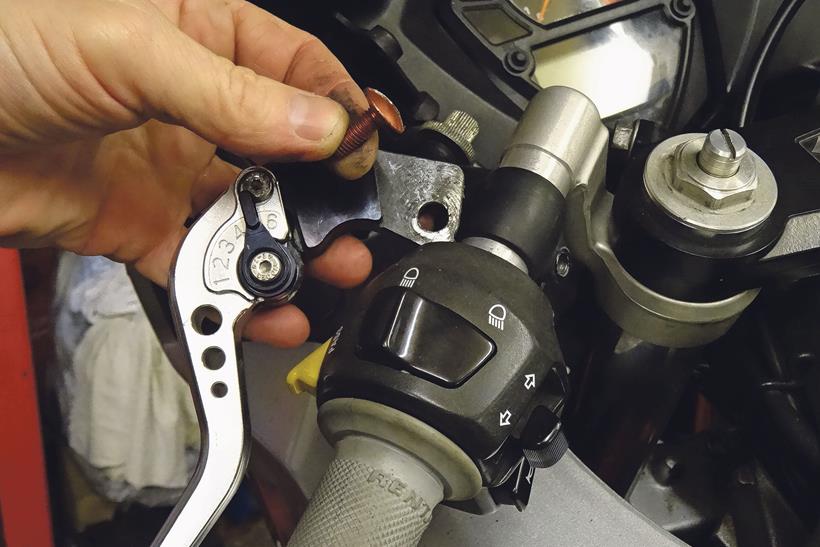
Step 2: clean and grease
The pivot bolt that goes through the bush on the lever should have a light coating of grease. Give it a clean, apply a dab of grease and re-install. Take care here as there is often a micro switch that has an actuator located in the bracket. Make a note of how the lever interacts with the switch and ensure it operates properly.
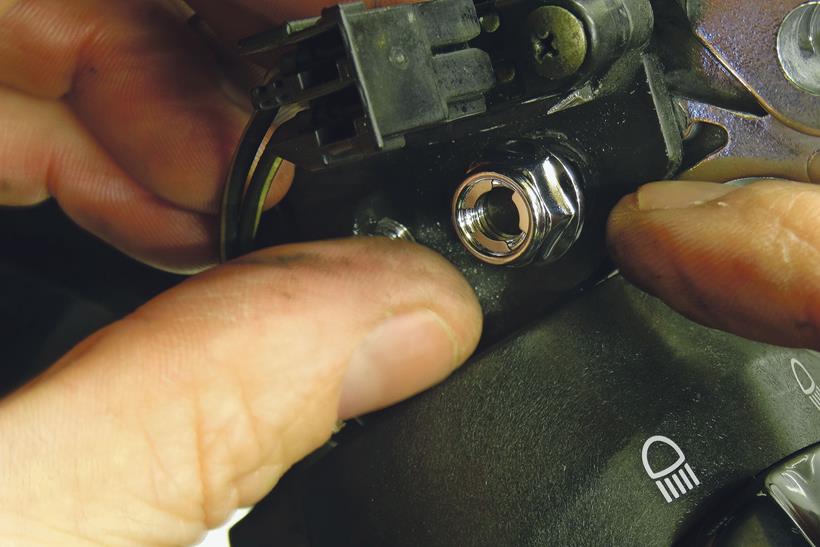
Step 3: install the new pivot bolt
Install the new pivot bolt but don’t over-tighten. It usually screws into threads on the bracket and only needs to be seated with minimal force. It does this purely to seat itself squarely and act as a spacer for the lever bush. The nut that retains the bolt is often a self- locking type and requires very little force to torque it up.
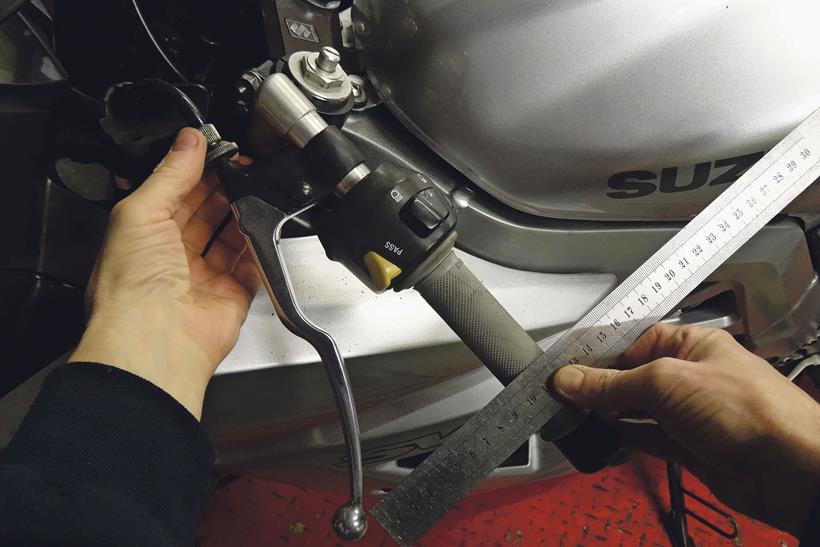
Step 4: adjust the freeplay
Check the bike’s manual to find the specified freeplay for the lever, then adjust the knurled adjuster as needed – 10-20mm is a typical figure. This should be measured from the handlebar to the end of the clutch lever but the method varies from bike to bike so always consult the owner’s manual.
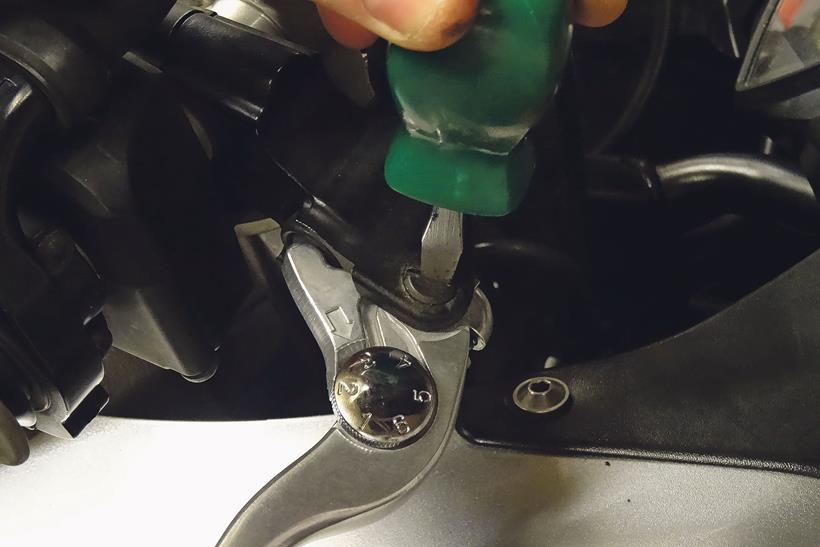
Step 5: remove the brake lever
Undo the brake lever pivot bolt nut using a screwdriver and spanner then pull it out. Remove the old lever and give the area where the master cylinder actuates a good clean with brake cleaner. Check that the brake light switch is intact and that the electrical connectors are firmly fixed.
Step 6: fit the new brake lever
Fit the new lever and install the pivot bolt with a smear of grease. Don’t overtighten the bolt – the lock nut will need to be done up to a low torque setting and it’s critical not to tighten it excessively. Check the lever action is free and doesn’t bind then ask a helper to stand behind the bike to make sure the brake light is working.
Frequently asked questions
Are clutch and brake levers universal fit?
Not really no, some will claim to be universal but it is important to ensure they fit correctly or else they could be dangerous, so it is advised to buy levers that are specifically made to fit your model of motorcycle.
Why are some levers so much more expensive?
You get what you pay for essentially, cheaper levers are made to a much lesser quality from poorer materials. They often don’t fit correctly or will damage and fade rapidly.
How MCN tests levers
Here at MCN, we make it our mission to help you find the right kit for you, at the right price for your budget. We test our levers the same way you’ll use yours; by fitting them to the bike and riding with them. Our word is backed by hundreds of thousands of miles in the saddle collectively, but our recommendations come from each tester individually.
While testing, we predominantly focus on build quality, and value. When we write up our full reviews, we’ll give each pair of levers a rating out of five stars in each of these categories. This page is only for the best motorcycle levers, so every pair you’ll see has been awarded at least four stars overall – that’s the passing grade – but here’s what each score really means:
1 star – Poor performance in this category or overall. A product with a single star rating has fallen below the expected standard and should be avoided.
2 stars – Basic performance in this area or overall. A product with a two-star rating has managed to perform to a barely acceptable level, and there is much room for improvement.
3 stars – An average performance in this area or overall. A product with a three-star rating has achieved a basic level of performance and is deemed adequate.
4 stars – A product has performed over and above the accepted averaged in this category or overall. A product with a four-star rating has surpassed expectation and delivered in a particularly impressive way.
5 stars – A product has performed at the highest possible level in a particular category or overall. A product with a five-star rating has delivered to the highest possible level, impressing the tester with its performance. We would happily spend our own money on it.
To find out more, head to our dedicated page explaining how we test motorcycle products.
- Just so you know, we may receive a commission or other compensation from the links on this website - read why you should trust us.


