Braking bad? How to change your motorbike's brake fluid

Changing your motorbike’s brake fluid is a relatively easy DIY job. It may be hidden from view, but the liquid inside your bike’s braking system should never be taken for granted.
Over time the fluid degrades and overall performance can be affected, so regular changes are vital.
How much does a motorbike brake fluid change cost?
If you do it yourself and have the right tools, a motorcycle brake fluid change costs as much as a new bottle of fluid, which can be as cheap as £5. Do make sure you’ve checked your manual to find out what the manufacturer recommends, though. This isn’t something you want to cut corners with. A bleed kit usually costs around £15.
How to change your bike’s brake fluid in 10 steps:
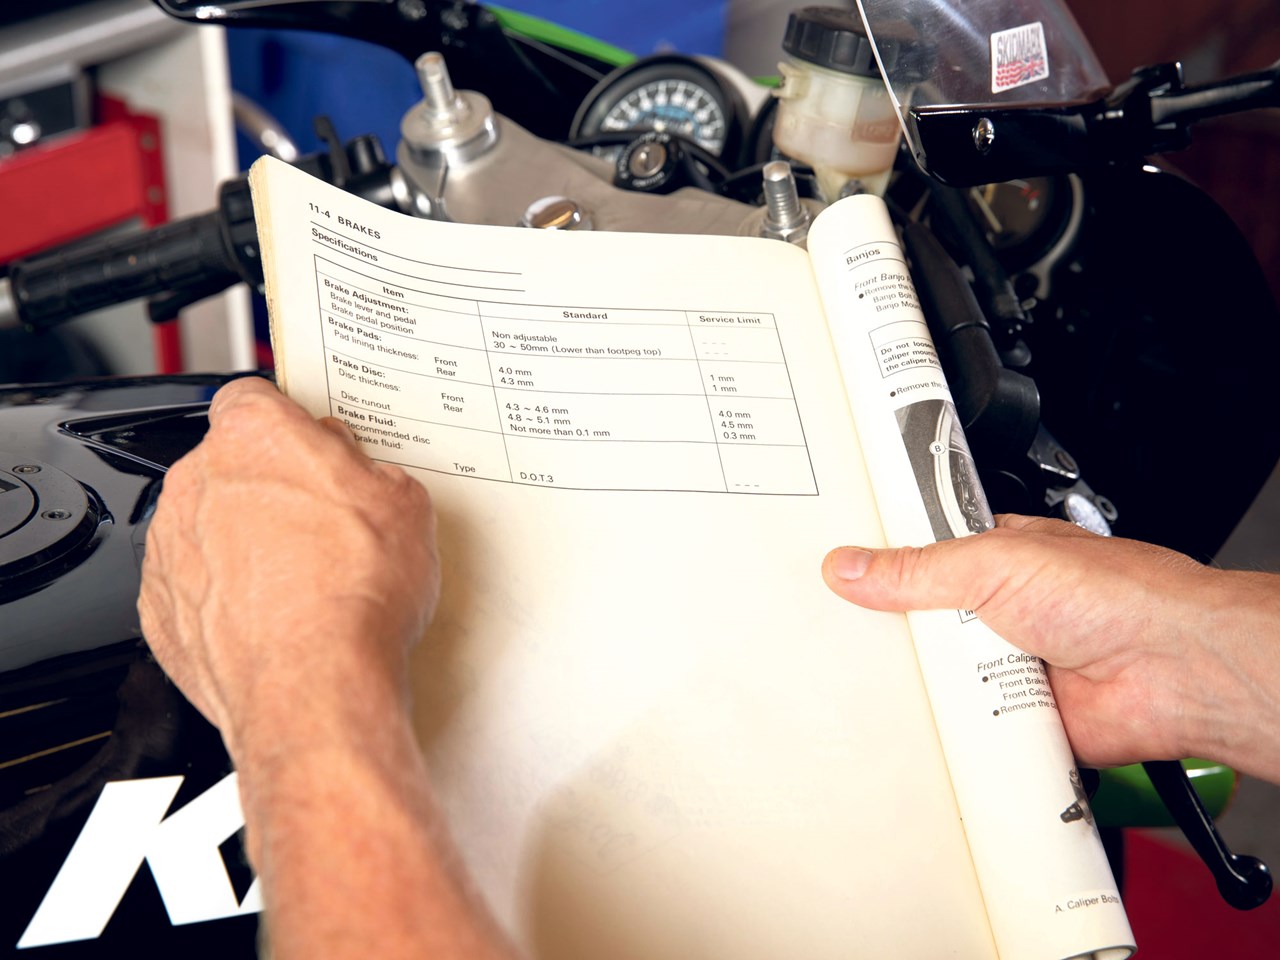
1. Time for a change?

Look in your workshop handbook for the manufacturer’s recommended interval for fluid change. Place the bike on stands so it is upright and level.
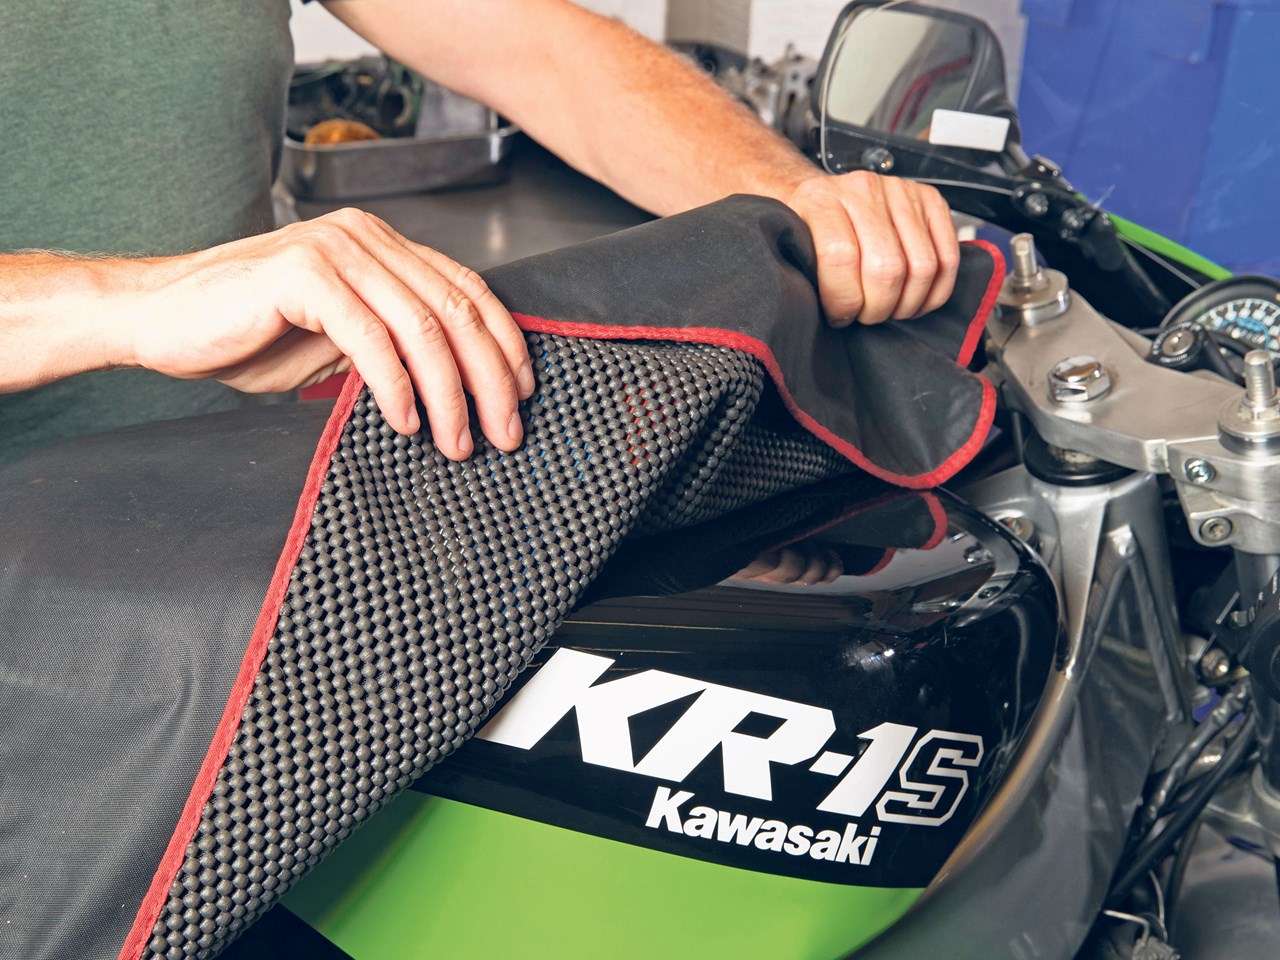
2. Protect your paint

Brake fluid is extremely damaging to painted surfaces, so prepare the area around the tank and handlebars for any possible spillage. Cover the tank and headstock area with an old towel, sheet or bike cover. Always have a few sheets of workshop paper towel at hand ready to quickly mop up any drips that find their way on to unprotected areas.
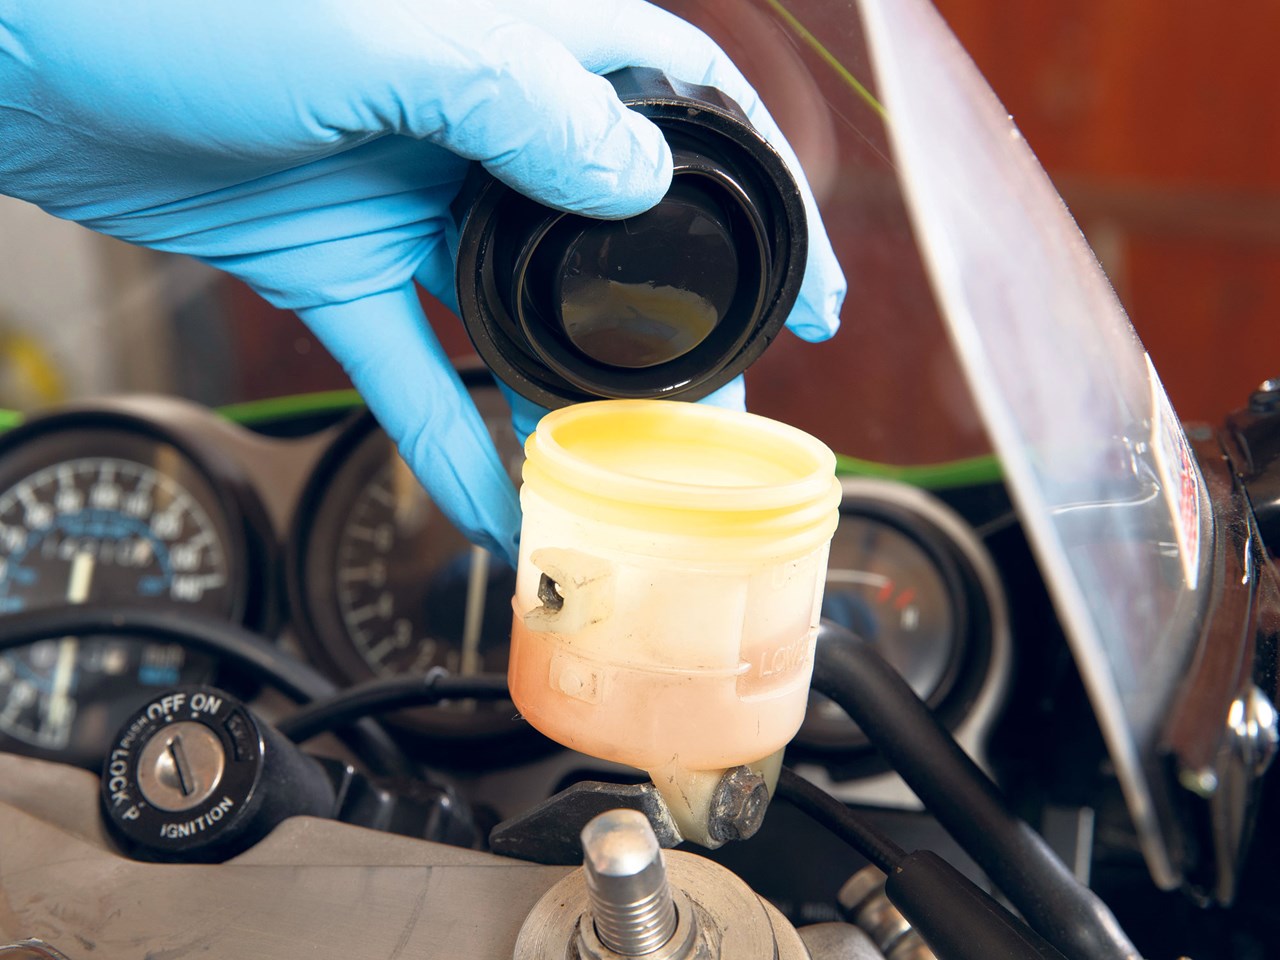
3. Open the reservoir

Wear protective workshop gloves from this point on. Remove the reservoir lid; sometimes it is retained with a screw and locating bracket. When removing the lid do it slowly making sure the diaphragm isn’t going to drop off. Sometimes it will remain in the reservoir; if this is the case gently ease it off and have paper towel to hand to catch any drips.
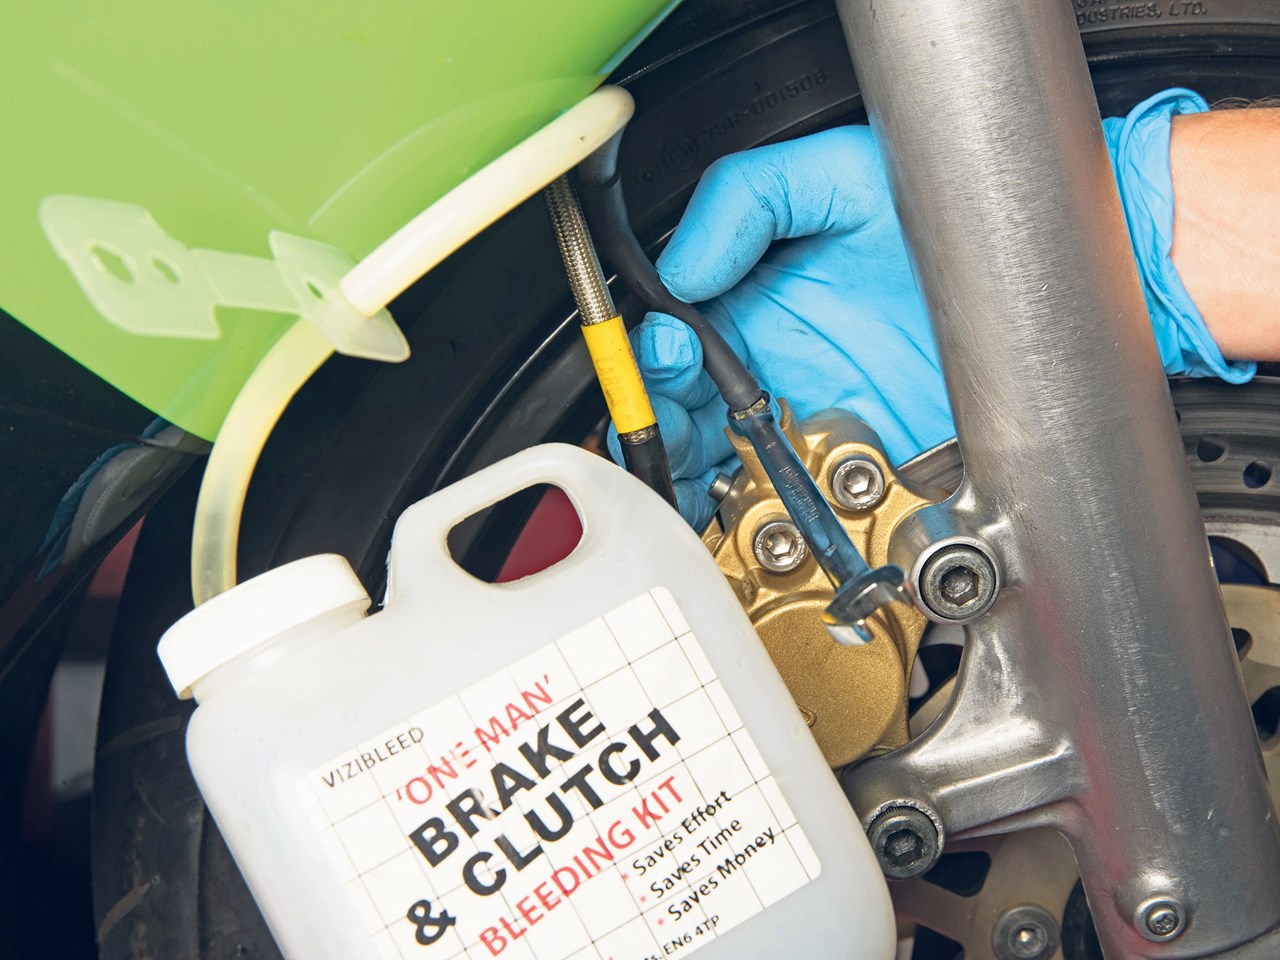
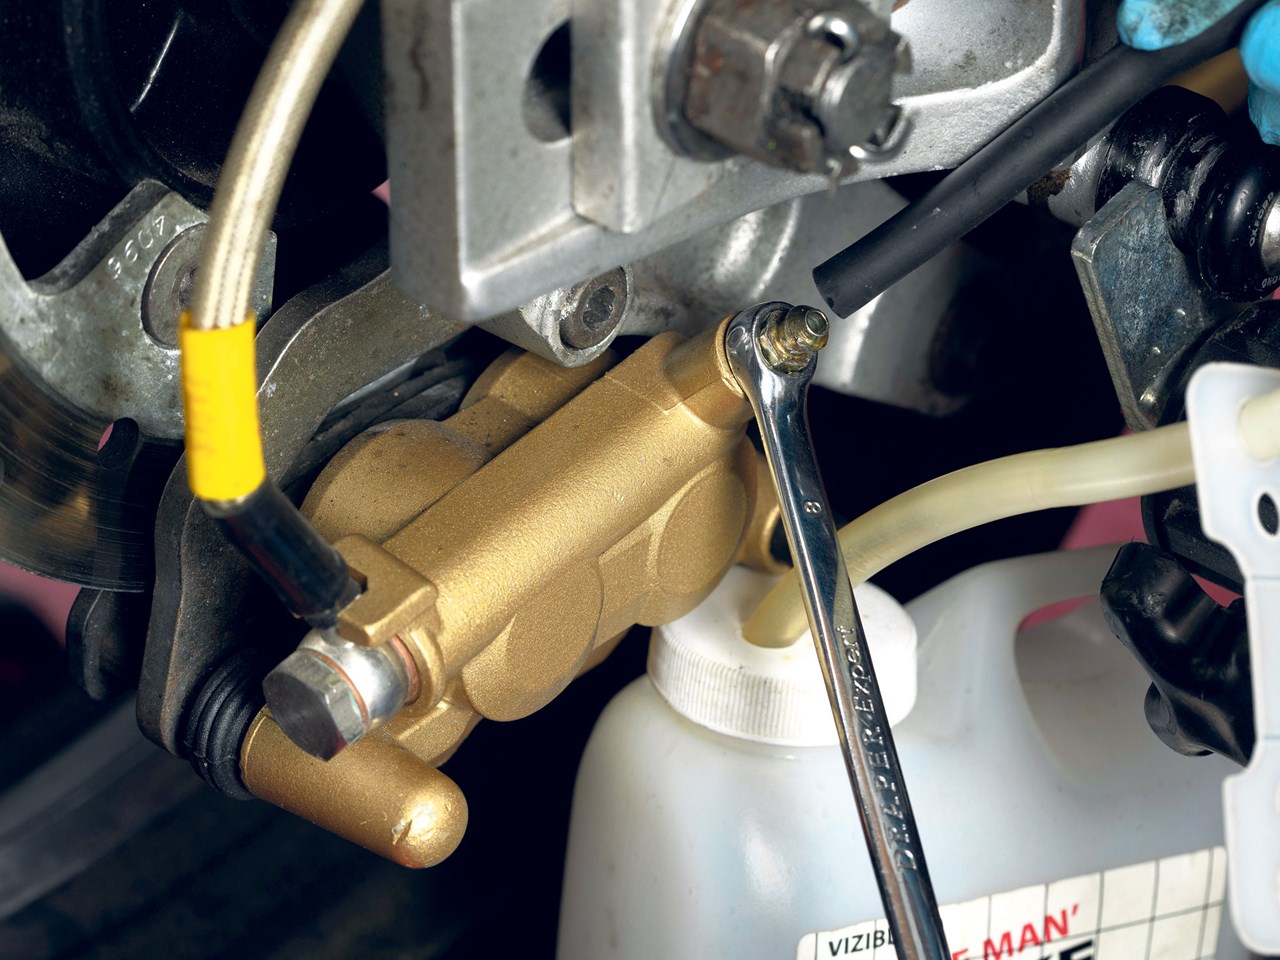
4. Tweak your nipple

Identify the size of the spanner needed to fit the bleed nipple, it’s usually between 8mm-10mm. Remove the rubber grommet protecting the nipple. Ideally use a ring spanner and place it on the nipple so that it can be loosened a few degrees without hitting anything. Fit the pipe from the bleed kit to the exposed nipple.
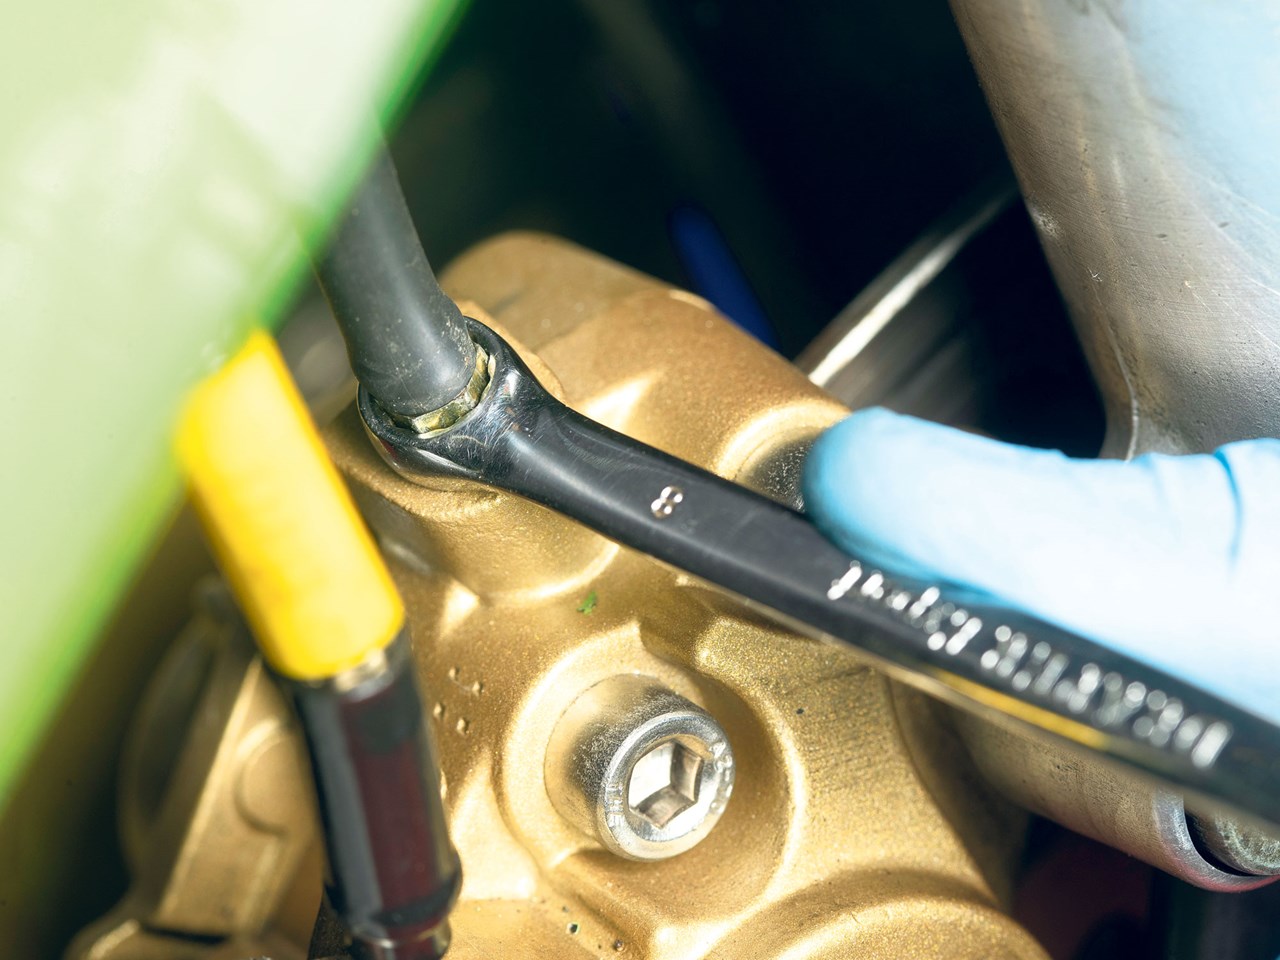
5. Crack and squeeze

Crack the nipple carefully while applying pressure to the brake lever. Tighten the nipple and let go of the lever. Repeat this until you see a clear stream of bubble-free fluid in the transparent part of the tube, then pump the fluid through, stopping to tighten the nipple every time.
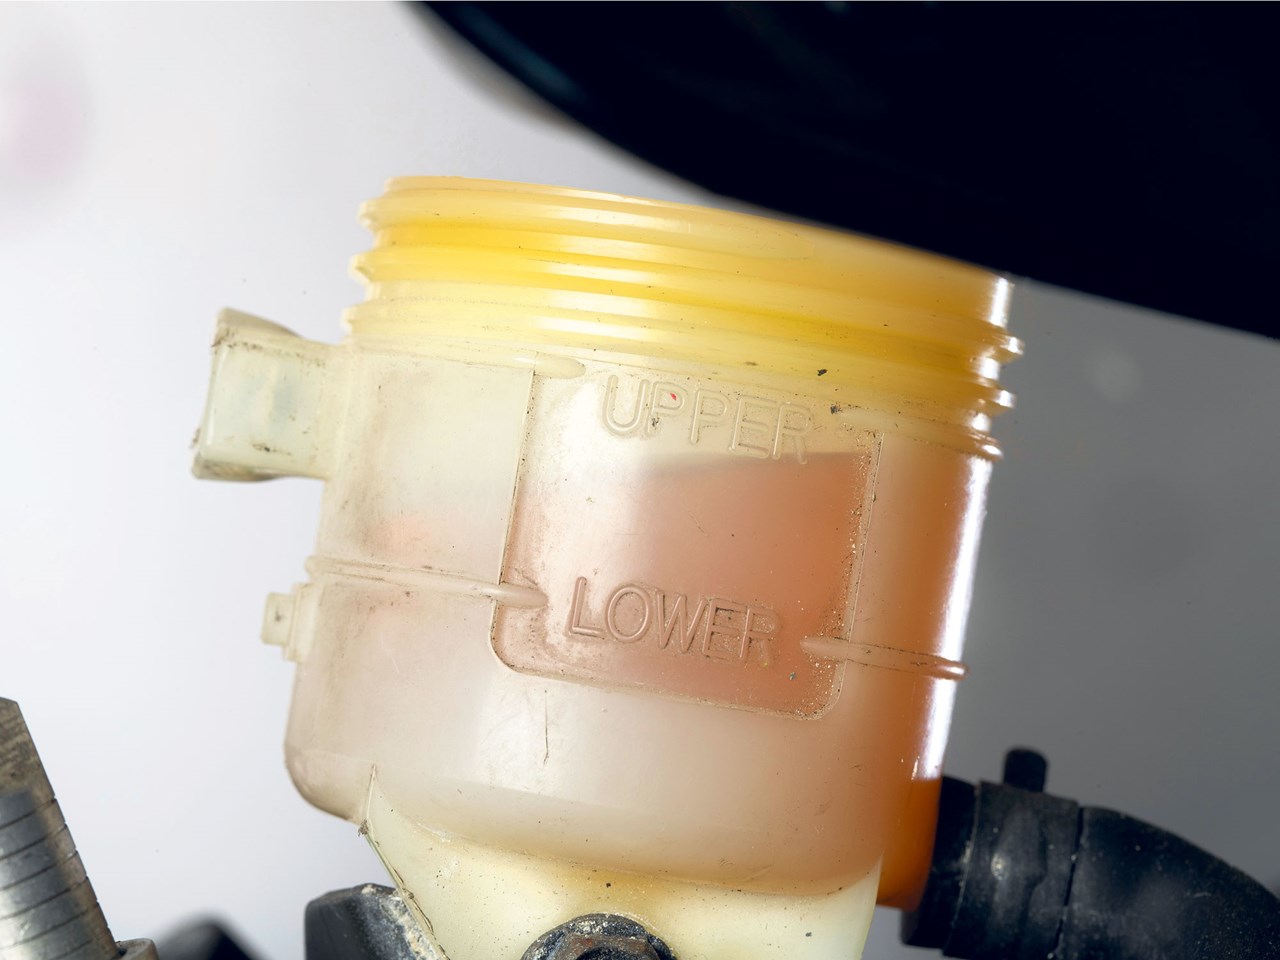
6. Top up with fresh fluid

Add fresh brake fluid as the level inside the master cylinder reduces with each pump of the lever. Sometimes the process can be sped up by having your brake lever span adjusted to its maximum. Don’t move the lever too quickly or it could pop the bleed pipe off and spit fluid everywhere.
7. Watch for a colour change

Fresh fluid looks lighter than old fluid, so when you see a colour change in the bleed kit’s transparent pipe, tighten the nipple up, check the master cylinder level is okay and release the lever. Most bikes have twin discs on the front, so the opposite caliper will need the same technique to flush out the old fluid. An extra pair of hands can help here.
8. Check for air

With both calipers flushed with new brake fluid, hold in the lever one final time, crack the nipple and make sure that there are no air bubbles in the tube, then re-tighten. Repeat for both calipers. The brake lever should be firm with no sponginess. Top up the reservoir to the correct level. Refit the cap, making sure the diaphragm is seated correctly.
9. Repeat at the rear

The same technique can be applied to the rear brake. Use the bleed kit and pump the out the old fluid while adding fresh. It’s worth pointing out that a lot of rear calipers are fitted with two bleed nipples. If this is the case, use the nipple that is in the highest position as this will help to keep any air out of the system.
10. Give it a final once-over

With all three calipers now flushed, check both front and rear fluid reservoirs are filled to their upper levels. Then go around the bike and visually inspect the condition of other parts of the braking system, such as pads, hose routing, banjo bolts and any hose-retaining clips, as well as looking out for any leaks.
Kit you’ll need to change your brake fluid
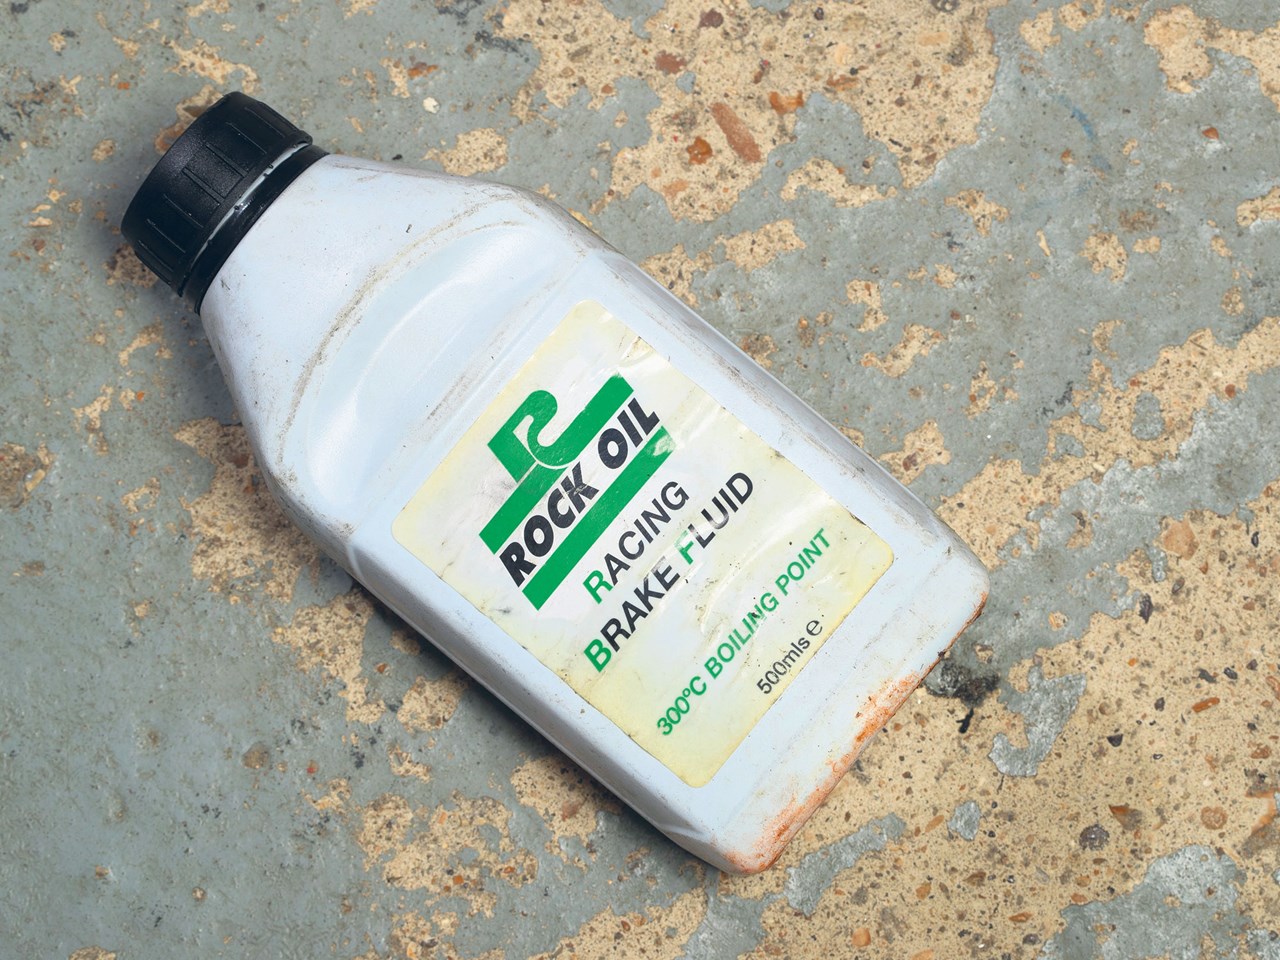
Brake fluid – comes in different types; from DOT 2, which is castor oil based, to DOT 5.1, which is glycol based. Each has its own properties relating to boiling points so check with your manual as to which is recommended for your model.

8mm, 9mm and 10mm spanners – essential for loosening and tightening bleed nipples. Ensure you use the correct size so as not to round off the nipple.

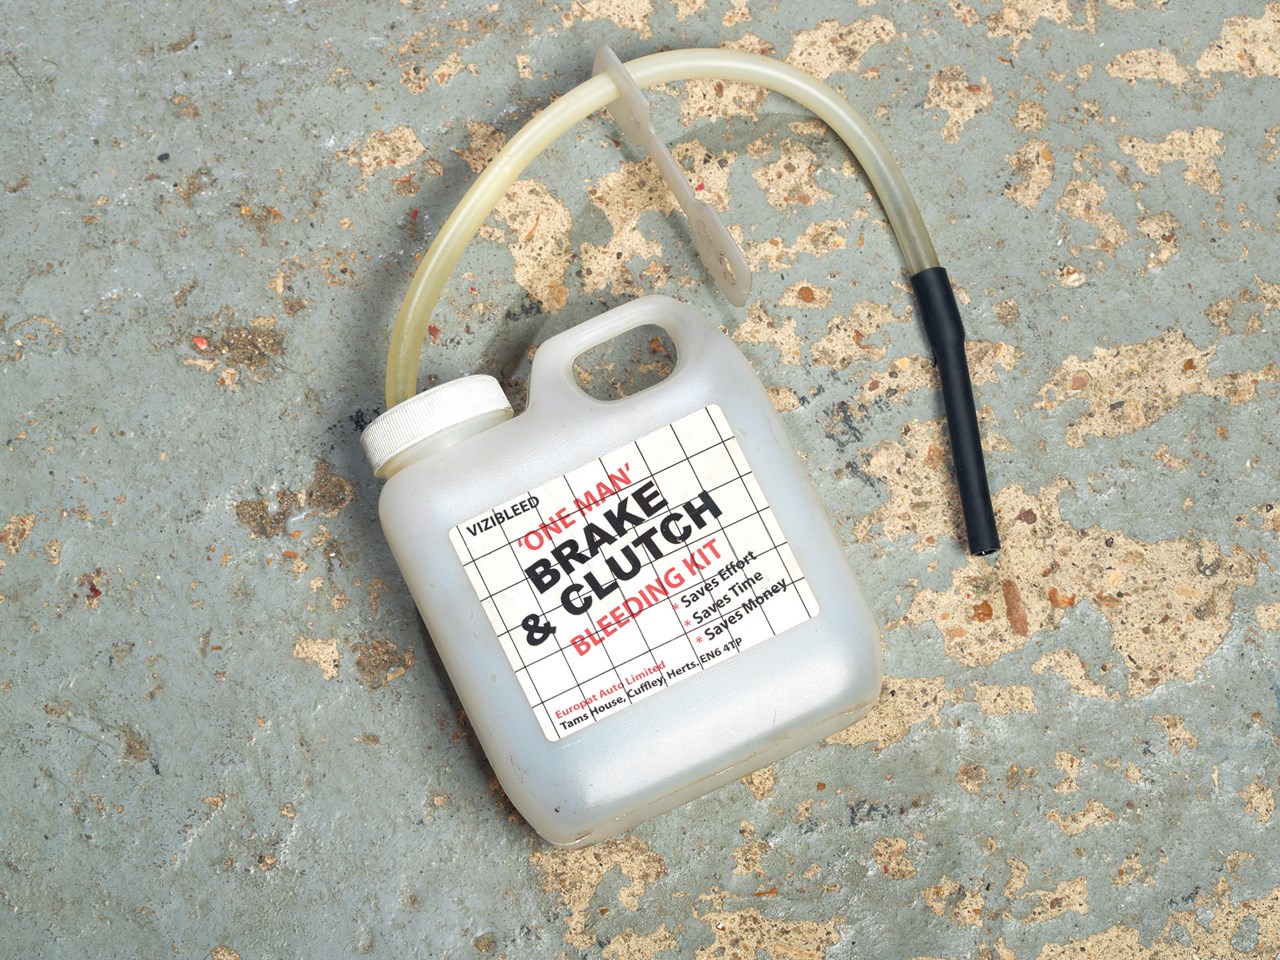
Bleed kit – essentially a plastic container with a couple of lengths of clear hosing, bleed kits can make the process of flushing your brake fluid a little less messy. They cost around £5.

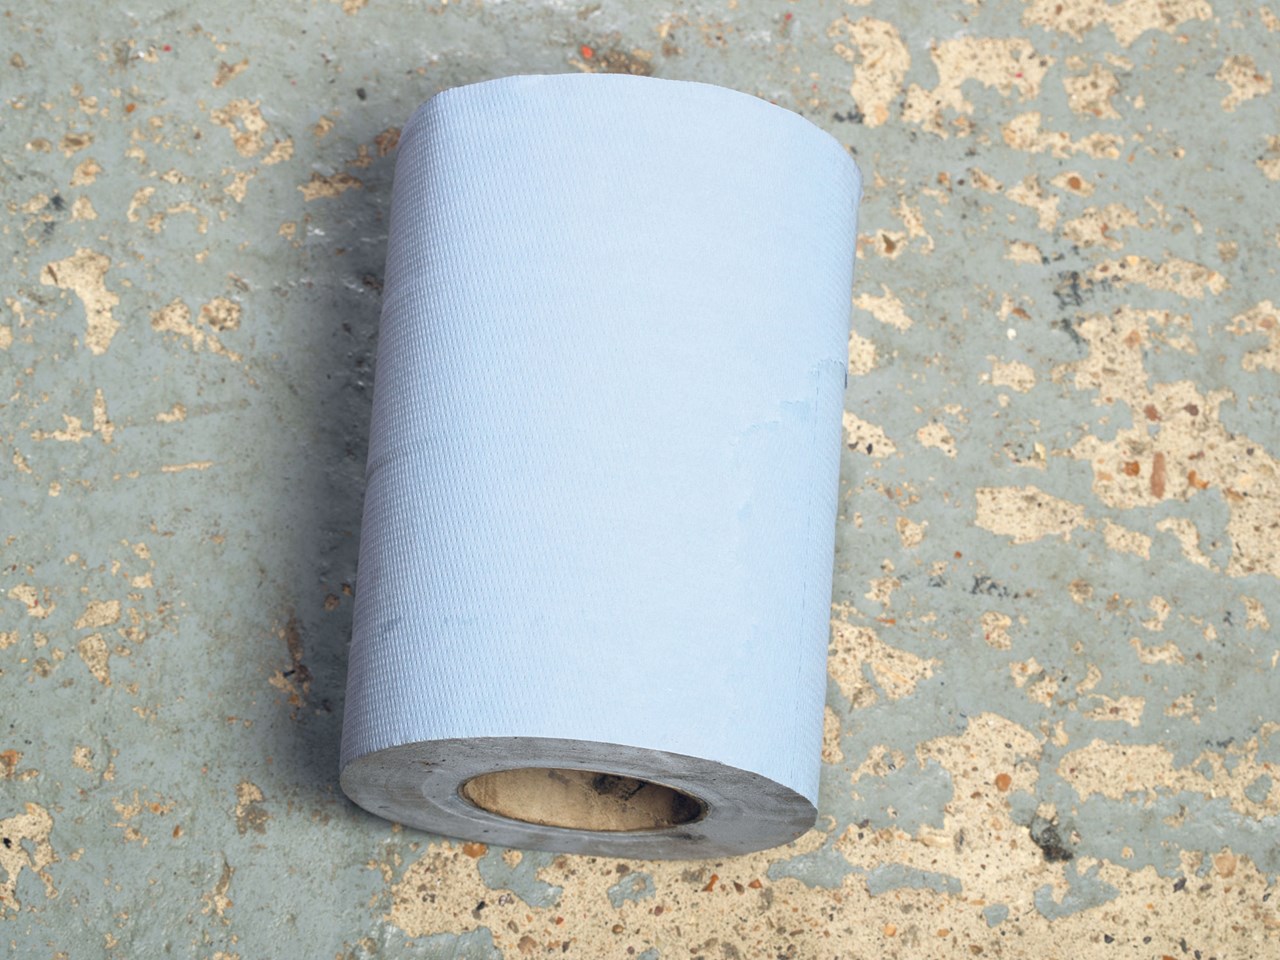
Paper towel – do not start the process of bleeding your brakes without plenty of paper or rags to mop up any fluid spills. Brake fluid is extremely damaging to paintwork. You have been warned.

Promoted: Get all the parts, tools and consumables you need for this job from https://www.mandp.co.uk/

 Check the owners' manual for the correct fluid and change intervals
 Give it a final once-over
 Protect your paint
 Tweak your nipple
 Crack the nipple and squeeze brake lever
 Top up with fresh brake fluid
 Watch for the colour change
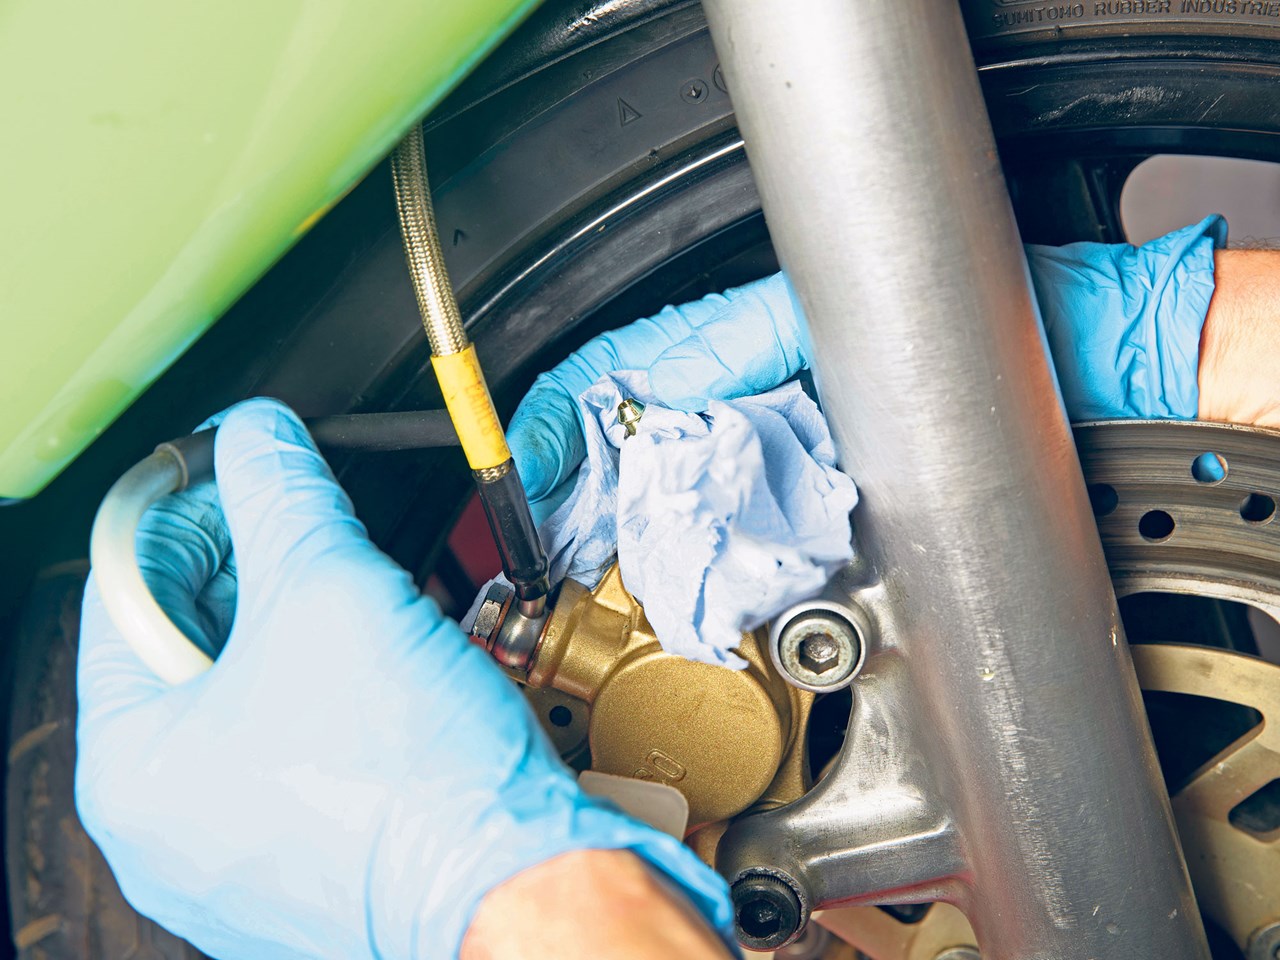 Check for air
 Repeat at the rear
 Bleed kit for brake fluid
 Brake fluid
 Paper towel
 8mm, 9mm and 10mm spanners
