How to unseize your stoppers | Learn to overhaul your brake calipers with MCN's expert mechanic

Just like every moving part on your motorbike, your brake calipers need servicing to keep them in proper working order. Swapping the fluid and replacing the brake pads is important but giving them a good clean is great maintenance, too. But if they’ve got really cruddy over winter or started to seize then a more in-depth overhaul could be in order.
It goes without saying that your brakes are one of, if not the most important part of your motorbike from a safety perspective. Building any level of speed on a bike that can’t stop will never end well, so it’s vitally important that your levers, hydraulics, calipers, pads and discs are all in good working order.
More how-to guides from MCN
- How to deep clean your wheels
- Learn to fix a weeping fork seal
- Change your own motorcycle tyres at home
It’s not just the ravages of winter that are responsible for binding brake calipers. Anyone’s who’s ever had to recommission a bike that has been derelict will know how the calipers are often in a diabolical state, especially if the bike’s been left outside and exposed to the elements.
In this situation, corrosion will have caused much more damage that can be dealt with at home. For example, if the pistons are so knackered that the hard chrome has started to flake off or the outside surface of the caliper has gone all fuzzy, you probably need to opt for a full refurb.
Luckily there are a couple of specialist companies out there that’ll do a brilliant job of refurbishing calipers with new seals, pistons and will refresh the body to OE or custom spec.
How to give your motorbike brakes an overhaul
In this guide, I’ll be taking you through the steps required to get your brakes back up to scratch, but if you’re not confident or you’re a novice mechanic, you can always have a professional take a look for you.
Clean the calipers

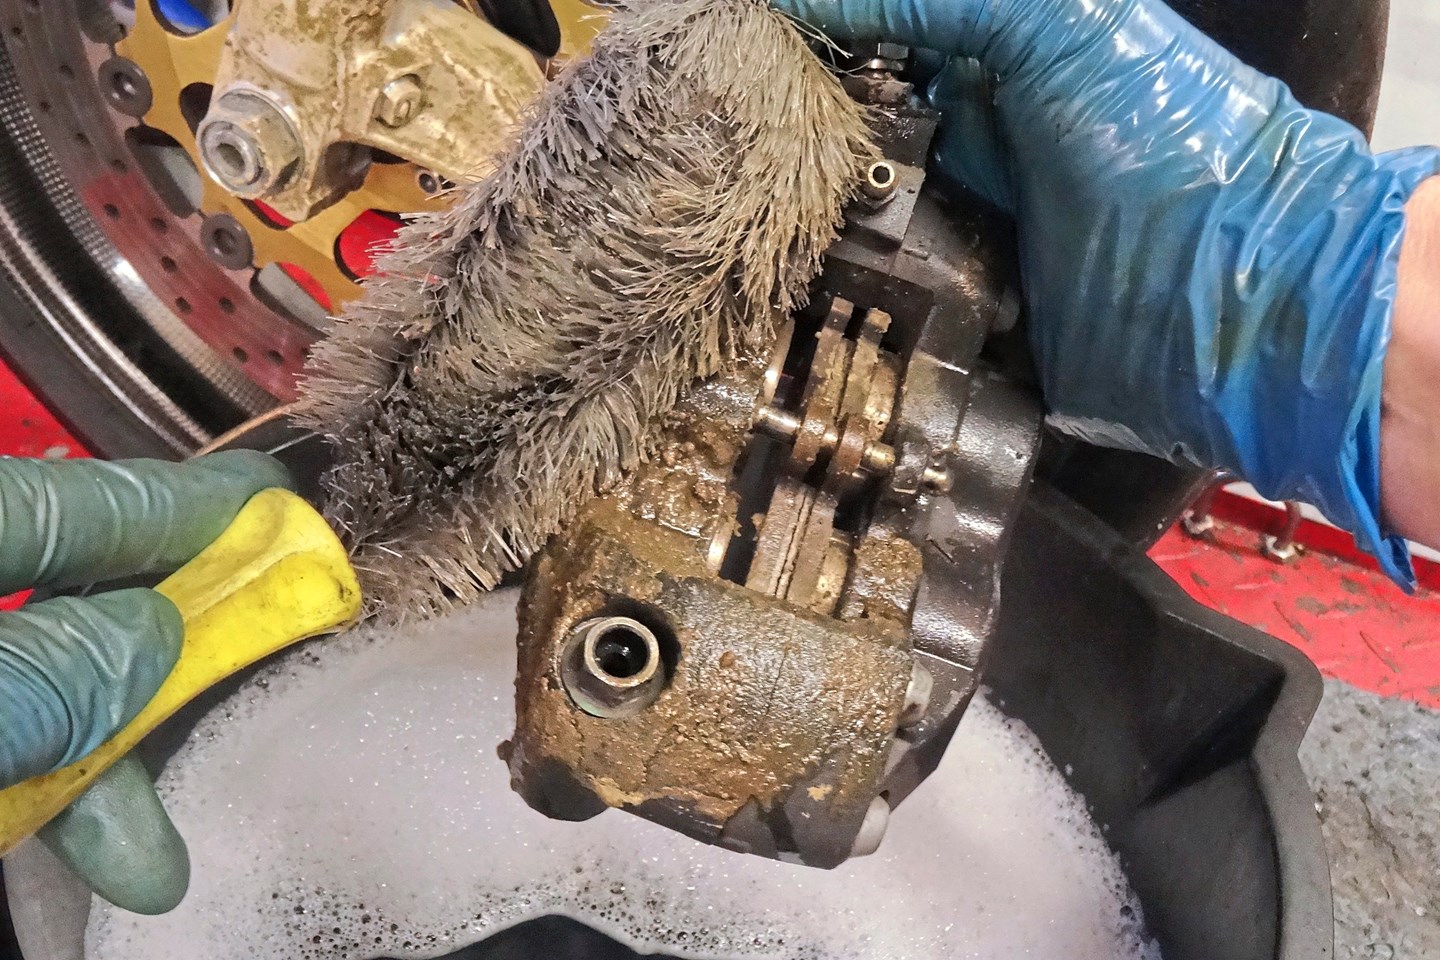
Undo the caliper bolts then give the caliper a decent scrub with bike cleaner, a bucket of water and a brush. The idea is to remove the heaviest deposits of road dirt and brake dust. Soak the caliper with cleaner, agitate the dirt until it yields, then rinse off with water. If you are re-using the same pads, try not to get the cleaning solution directly on to them.
If your brakes are still in good condition, this may be as far as you need to go.
Get ready to pull the pin

Work on one caliper at a time. Free the caliper from the bike by undoing the hose. Crack the banjo bolt and have a container plus workshop towel ready to catch any brake fluid. Loosen the pad retaining pins and remove the pads – if you are re-using them, make a note of which side of the caliper they were fitted to, and how the anti-rattle shim fits back in.
- Bruce’s tip: Once you’ve removed the hose, carefully place the end in a container.
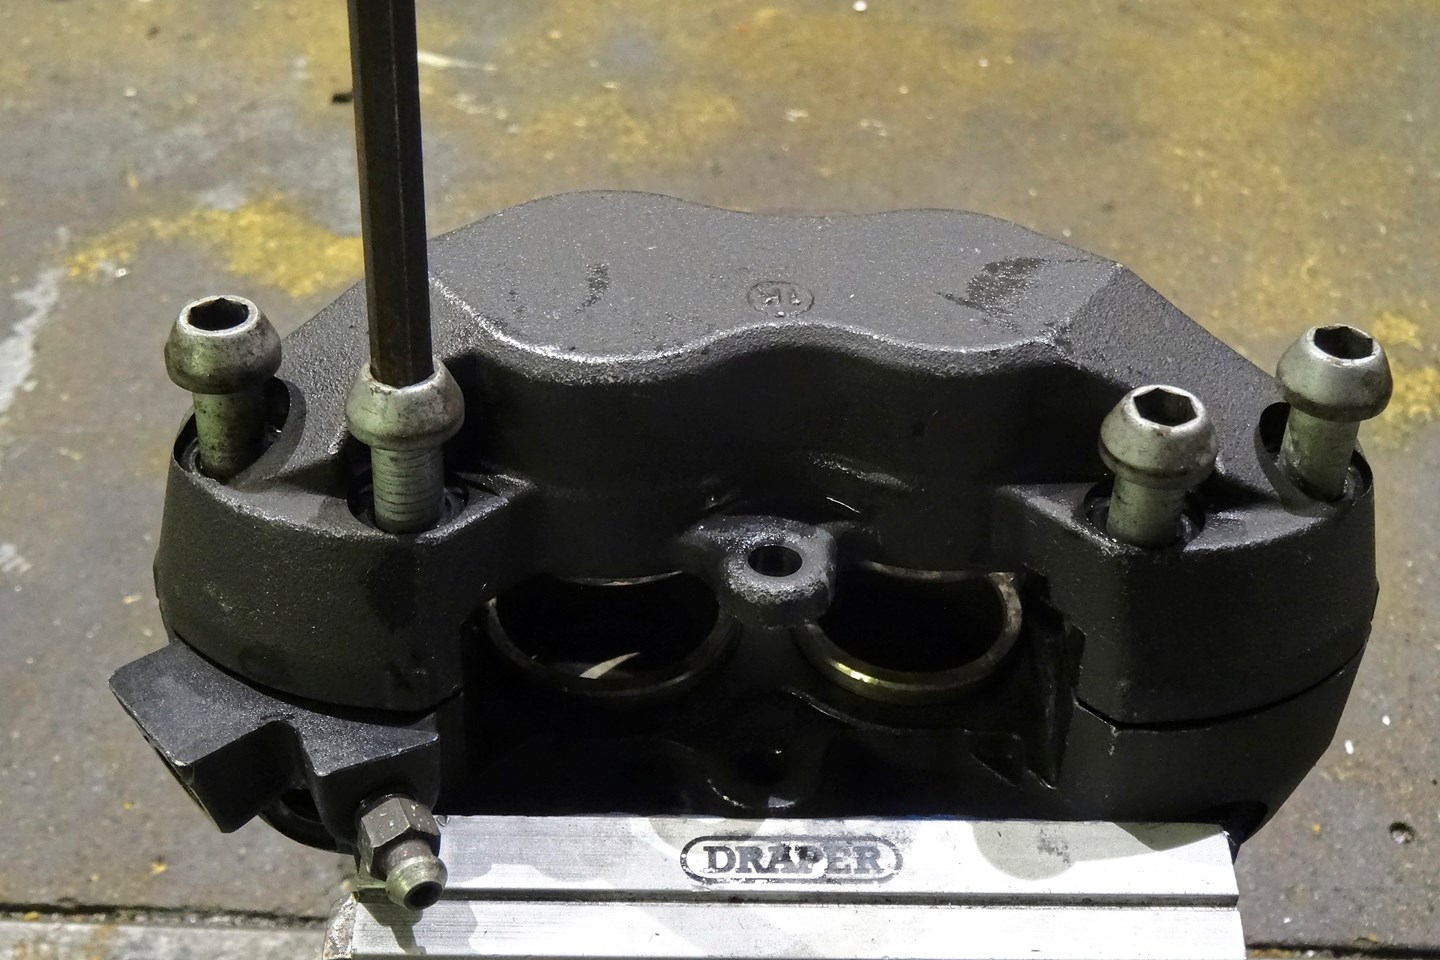
Clamp and unbolt

Clamp the caliper in a vice and then undo the bolts that secure the two halves. You may find that the bolts are different lengths, so make a note of which goes where. Just before the two halves come apart, keep an eye out for the O-ring/s located in the centre; these will be replaced, but keep them to make sure that the new ones match.
- Bruce’s tip: If the bolts are proving hard to shift, warm the caliper with a heat gun.
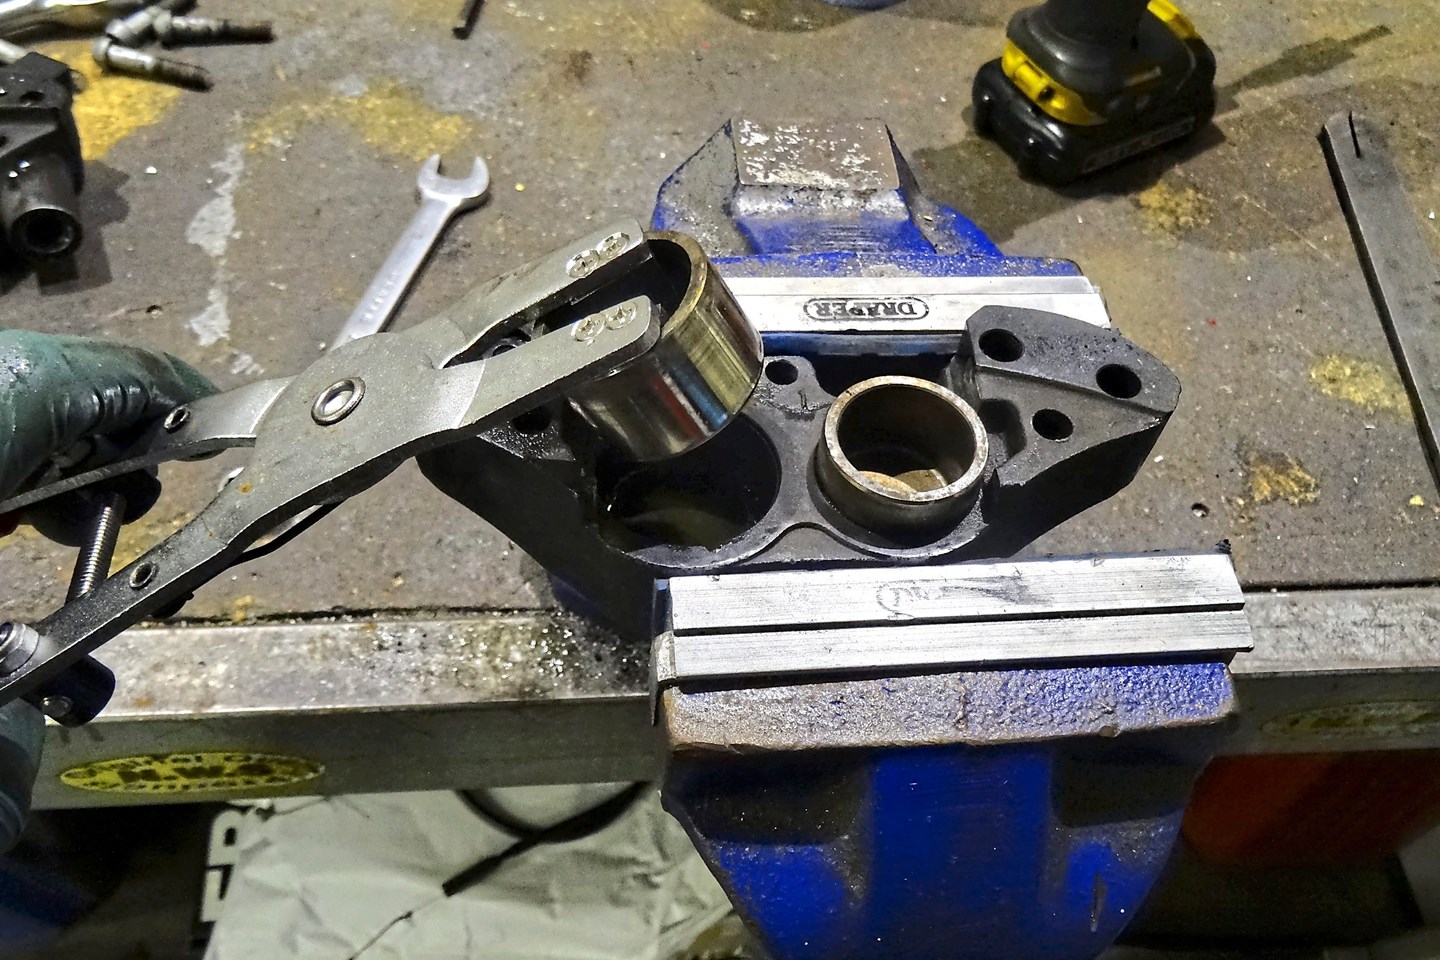
Extract the pistons

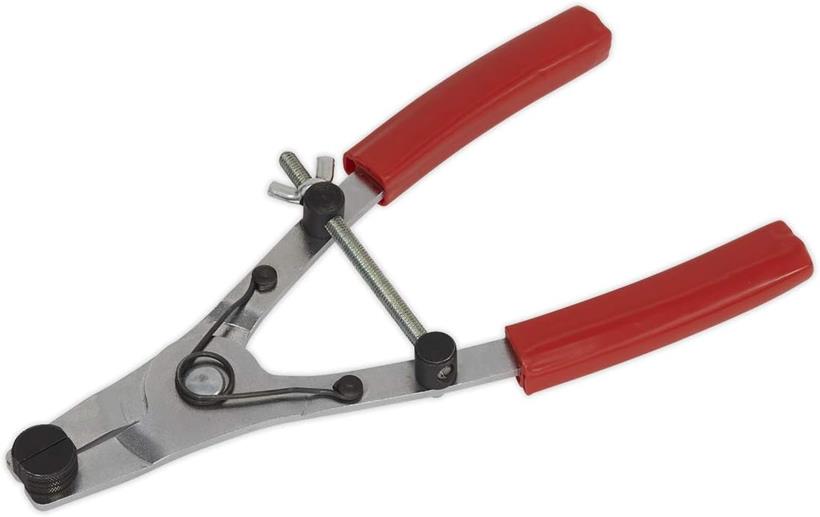
Remove the pistons ready for cleaning. The best way to do this is with a caliper piston tool which grabs from the inside so will not damage the delicate chrome outer. Don’t use mole grips or pipe grips as they will almost certainly slip and damage the piston.
- Bruce’s tip: This tool saves damaging the piston surface and is £20 well spent!

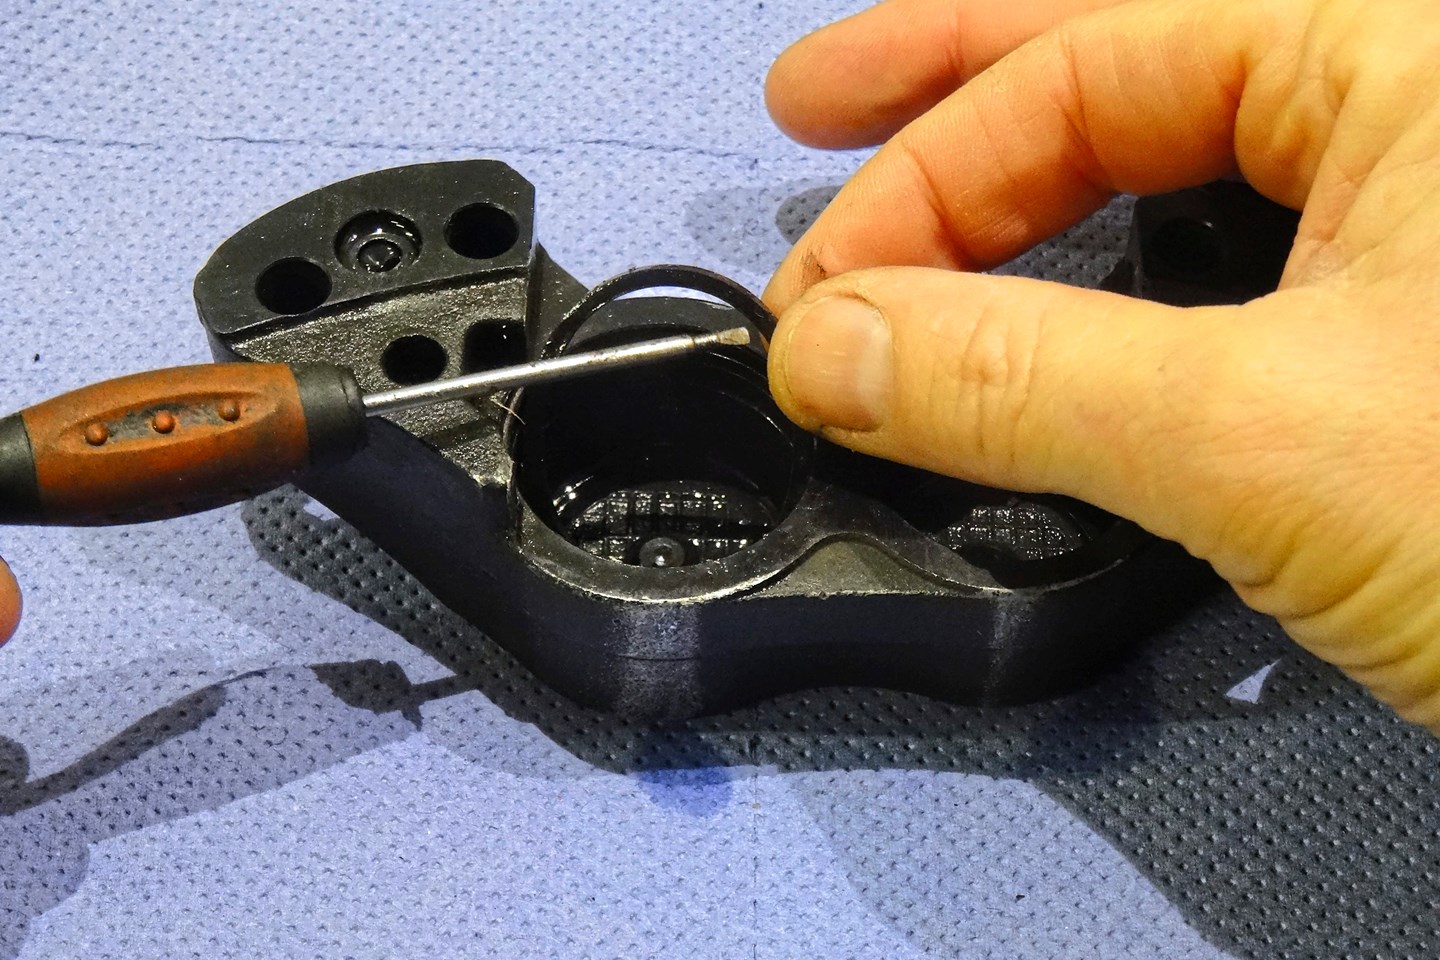
Pick out the seals

As the piston comes away, be prepared to catch any residual fluid. Using a fine pick or very small flat-bladed screwdriver, ease out all the seals. There will typically be two in each hole – an upper seal to keep out dust, and a second thicker seal to retain the brake fluid.
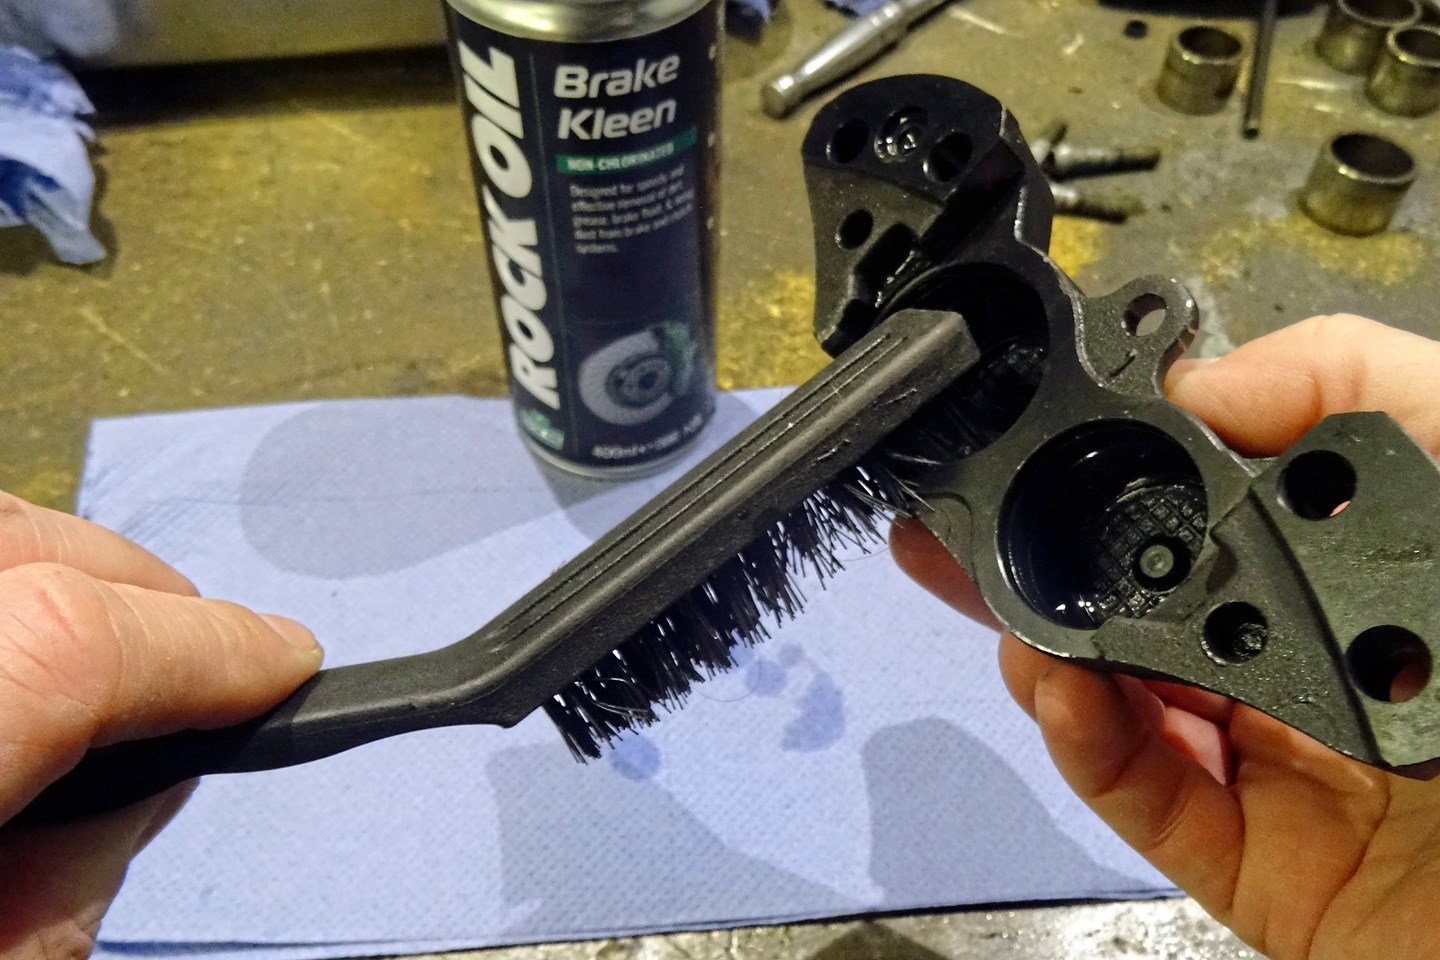
Crack down on corrosion

Check to see if there is any corrosion build up behind the seals. This type of corrosion will often show as a white, flaky accumulation and can be tricky to remove. Attack it using a small, stiff-bristled nylon brush, or a Scotchbrite pad soaked in brake cleaner.
- Bruce’s tip: Clean off any corrosion you spot lurking within the bores.
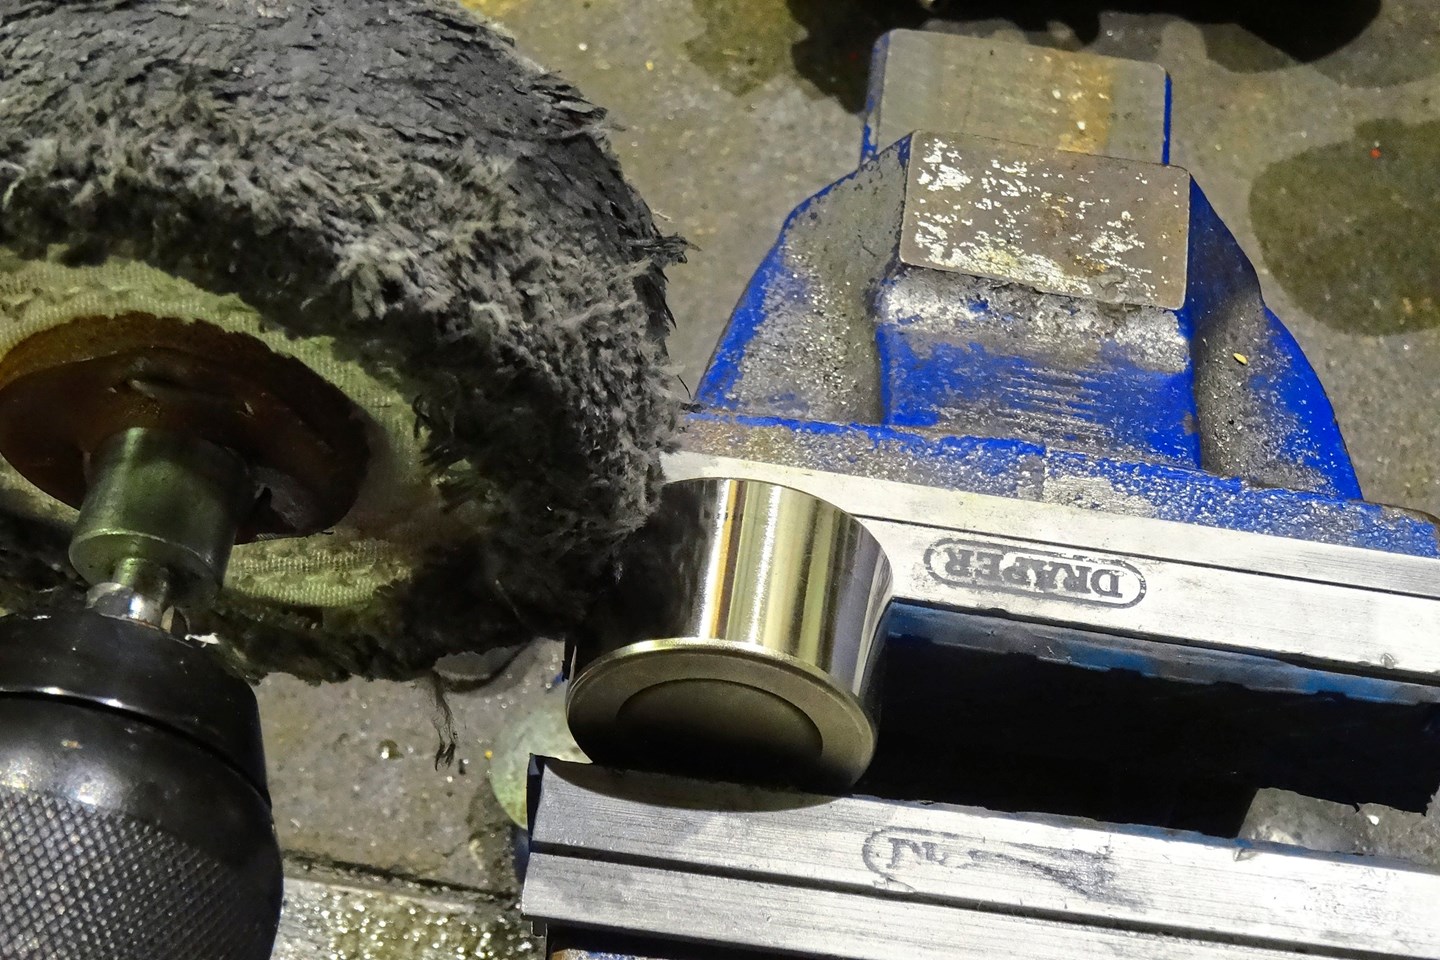
Buff to a shine

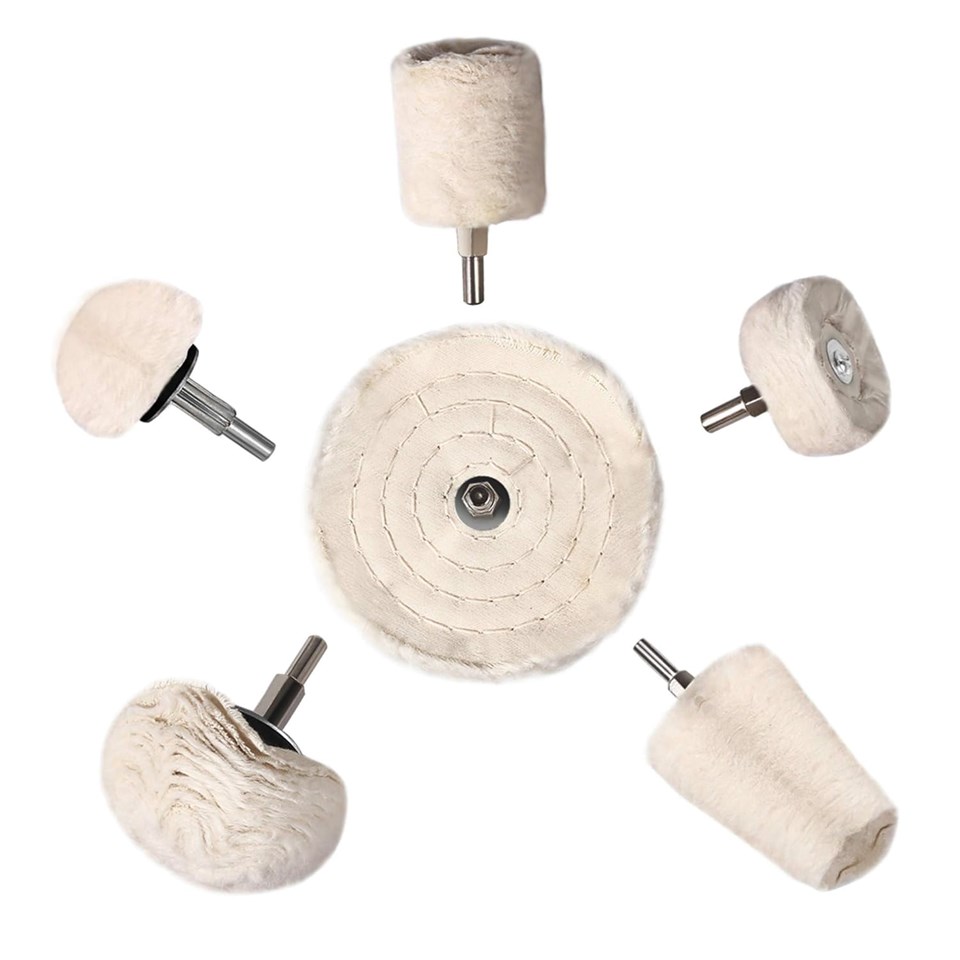
The majority of the piston will be in good condition, but you may find that the most exposed part gets dirty. Sort this by using a metal cleaner such as Autosol. A mop on a Dremmel or drill at a low speed will speed up the process. Buff with a cloth to finish.

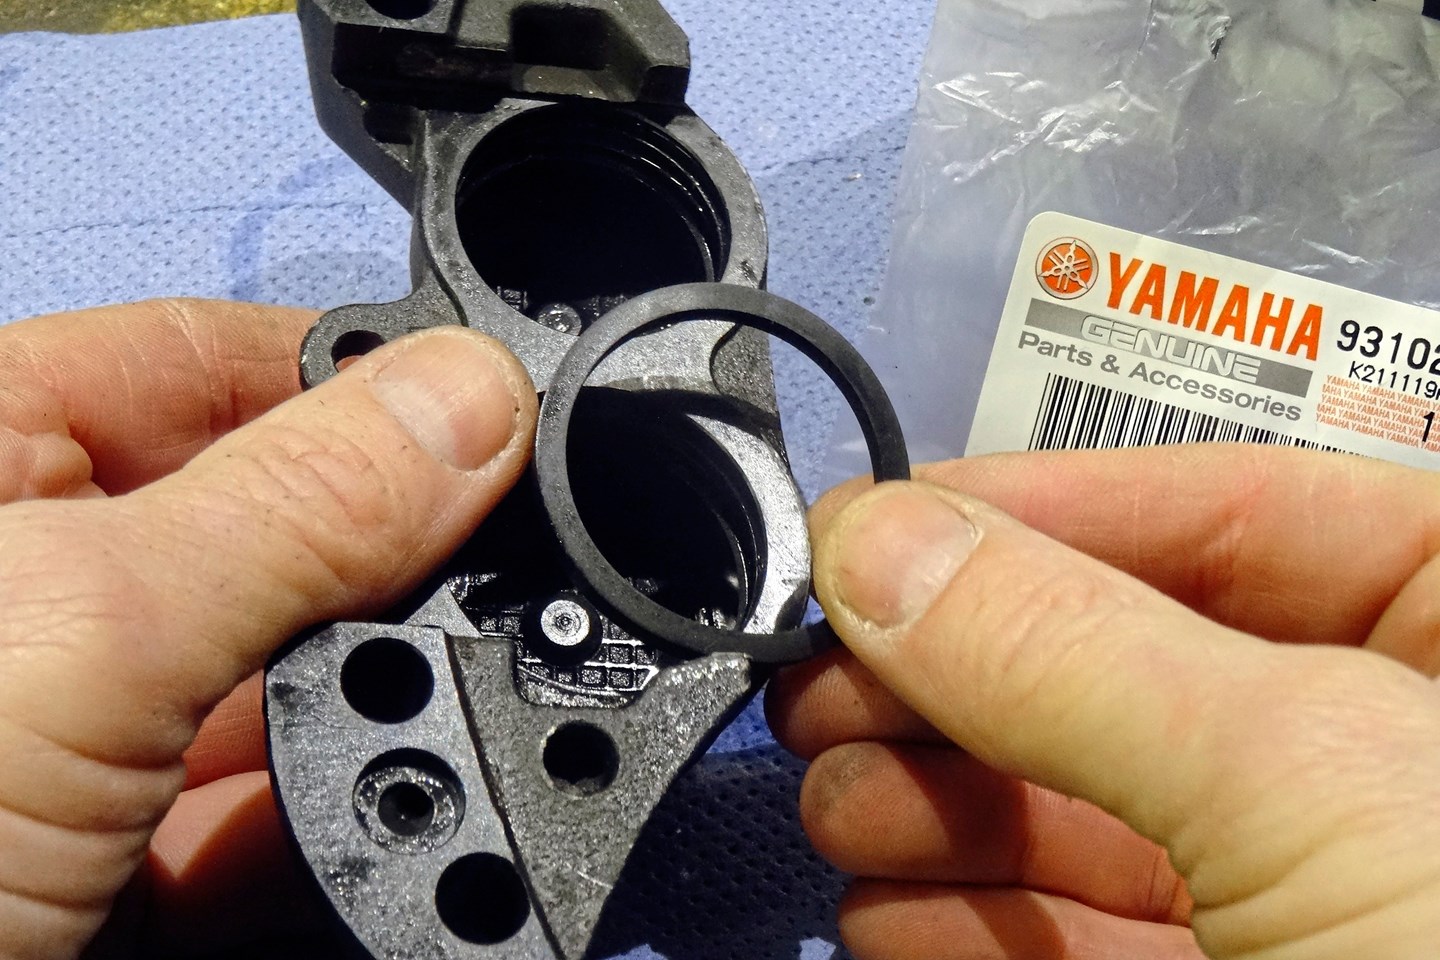
Fit the new seals

Give the caliper a blast of brake cleaner and then blast with an airline. Compare the new seals with the old. The thicker seal is for the brake fluid – check with the workshop manual, as often this seal is subtly shaped and will need to be fitted the correct way round.
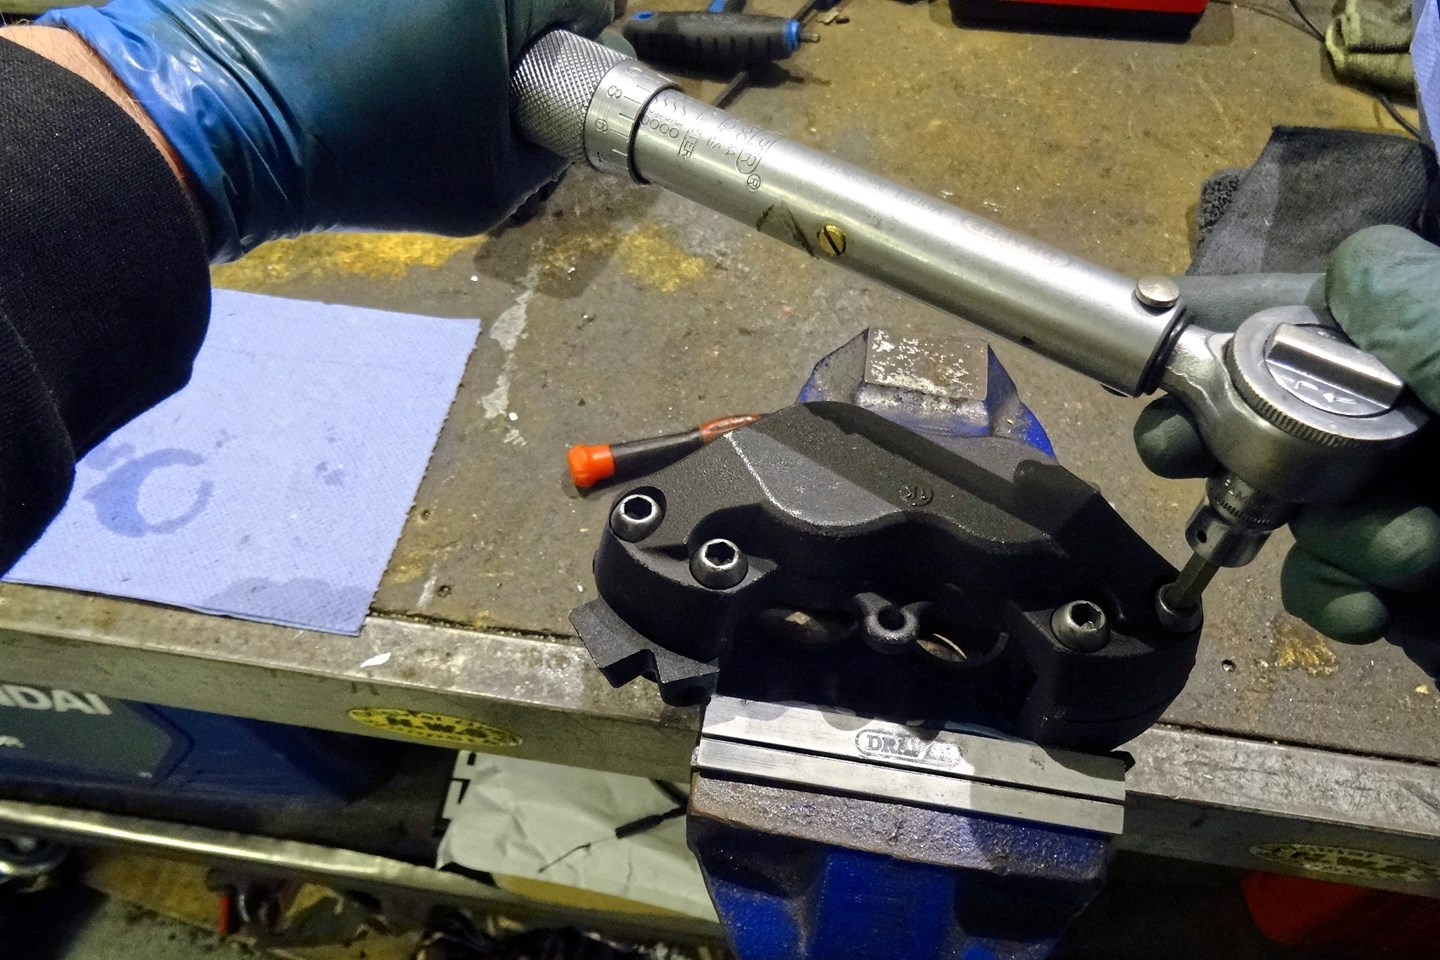
Torque it up

Apply a light smear of brake fluid on the lower seal before pushing the pistons back into the bores until they bottom out. Join the two halves using a new set of O-rings, and tighten up evenly with a torque wrench to spec. Replace the brake pads, reattach the hose, and refit the caliper.
- Bruce’s tip: You’ll need to bleed and top up the system with fresh brake fluid.
Just so you know, whilst we may receive a commission or other compensation from the links on this page, we never allow this to influence product selections – read why you should trust us.

 Sealey Brake Piston Pliers
 Buffing wheel set
 Cleaning a brake caliper with a brush over a bucket
 Removing a brake pad pin from the caliper
 Undoing motorcycle brake caliper bolts
 Using a tool to remove brake caliper piston safely
 Removing brake caliper seals
 Using a brush to clean up brake caliper bores
 Using a buffer to polish brake caliper piston
 Replacing brake caliper seals with new official parts
 Using a torque wrench to re-fit brake caliper bolts